Monday, 25 September 2017

Mini Gift Bag & Tag Set, Christmas, (Poppystamps) Holly Twig


Do you ever look through the gallery when you add your submission to a craft challenge?
I do...  and it never fails to amaze me how so many people can all come up with different ideas for the same theme.

So with that in mind, I wonder if you can correctly guess the challenge theme just by looking at my photo's...


'Christmas' or 'Use Holly' would be my guesses I think...  or perhaps 'Make A Christmas Project That Isn't A Card'...  or 'Use Ribbon' even...


But did anyone get it right, I wonder?


Poppystamps
PSC#36


It's not obvious at first glance is it?
But actually I think I've got quite a few dots on my project...  it's just that a fair few of them are 'oh so subtle' that they are easy to ignore.

Unlike my 'Enamel Dots' for the berries or that Polka Dot Ribbon!


As this was fairly straightforward to make I haven't included many photo's today, but here's a quick 'how to' guide showing some of the steps...


*


Using Iced Spruce and Hickory Smoke Distress Inks, decorate the front, back and side panels of a MFT Die-namics bag using the Memory Box 'Tiny Dots' stencil.

 Then add some lines front and back (using a scoreboard) before adding punch holes and a circle cut out.
(MFT Die-namics Stitched Circle STAX).


Cut out a piece of scrap acetate to size (big enough to cover over the circle yet small enough to comfortably fit inside the box.  Add Red Liner Tape 'round all the edges and attach to a piece of scrap plastic food netting.  (Mine's from Babybel Mini Cheese).
Glue this into place on the inside of the front panel and leave to dry thoroughly before assembling the bag.

To cover over the glue tabs showing on the inside back panel of the bag, cut out an additional front section only of the bag die from Matt Silver card stock and trim it down left, right, and bottom very slightly.   Don't forget to add the punch holes - not pictured!
And glue into place.


Using Peeled Paint, Forest Moss, Gathered Twigs and Walnut Stain Distress Inks, add colour to the Poppystamps Holly Twig.  I layered mine up three times for durability before adding
my Glitter Red Enamel Dots.

Once dry, glue into place on the front of the bag...
and add the Polka Dot Ribbon.


(As you can see, I went on to make a tiny complimentary gift tag using the same basic idea - minus the netting but still including the acetate.  This gift tag is also made by Poppystamps - 1845 'Heart Taglet').


*


Other Challenges I'm Entering...

NBUS Challenge #12
(First time using the Bag and the Holly Twig die).


Simon Says/Monday
Shimmer and Shine


So there you have it.

One tiny Christmas gift bag set.

Hope you like it.

Donna. x

Friday, 15 September 2017

Christmas Tag, Noel, Partial Snowflake

Tag You're It is back!!!

And what better way for me to say hello to you all on behalf of my very lovely team mates than to remind you that (like it or not) Christmas is coming...

Did I hear groans or 'whoops' coming from you, I wonder?

I have a very glittery tag to show you today...


...  and it's based this week on inspiration from the very lovely Tracey McNeely.


Now isn't that inky loveliness if ever there was any?


You may be wondering just how on earth my design came from this, but in reality that's an easy one to answer...


You see, Tracey's choice of stamp reminded me of a snowflake as soon as I saw it - and I had the perfect intricate die in mind.
So I turned things on their heads a little by pairing it with a tag that's not a tag, made the main focus  white by hiding similar colours to Tracey's tag underneath my main design and I made a feature of the sentiment, too.
Yet for all of that I've still got an equal amount of lovely 'white' space - even with two sequins that may have worked their way in somehow!


So how did I make my tag?


Let me tell you the supplies I used first...


*


Supplies Used:

Dies:
Penny Black - 'A Pocket Full'
Memory Box - 'Dazzling Snowflake'
Sizzix/Holtz Thinlits - 'Vintage Tidings'


Holtz/Distress Inks:
Hickory Smoke
Seedless Preserves
Dusty Concord

Other:
Sequins
Cord
Glitter Card - Black
Crafter's Companion/Spray & Sparkle Glitter Varnish - Silver


*


Take two scraps of card that are big enough to cut the notepaper die from and run them separately through your die cutting machine.

On one, ink up randomly and quite lightly with Hickory Smoke.
Add some water droplets (I just use wet hands and shake or clap them over the top), dab up the water with a paper towel and leave to dry.  Add more ink if desired and more water droplets until happy with the overall effect.
Then, once dry, place the snowflake die so that it's centre is fairly close to the edge and it's top is peeking out a little over the top edge of the tag.  Tape into place with slightly tacky tape (to prevent paper tearing on removal) and run through your die cut machine.
Then spray with Silver Glitter Varnish.

On the other, add random blobs of Seedless Preserves and Dusty Concord.

Glue the two tag shapes together.
(You will notice that I took the decision to turn one of my tag shapes back to front before applying ink so that the two don't quite marry up at the top.  It's a personal preference thing as I wanted a slightly more distressed look.  I also removed a small section at the top to let the colour underneath show through a little more).

Cut out the sentiment die three times and glue them all together.
Then once dry, glue into place...

Add a hole in the corner for the cord...

And add two sequins.


So there you have it.
A tag that isn't a tag...  that is a tag.

And why not?


*


I hope you have the time to come and join us.
We've gone back to our old format - so don't forget to check in on the main challenge page to see the closing date!


'Bye for now...

Donna. x

Wednesday, 23 August 2017

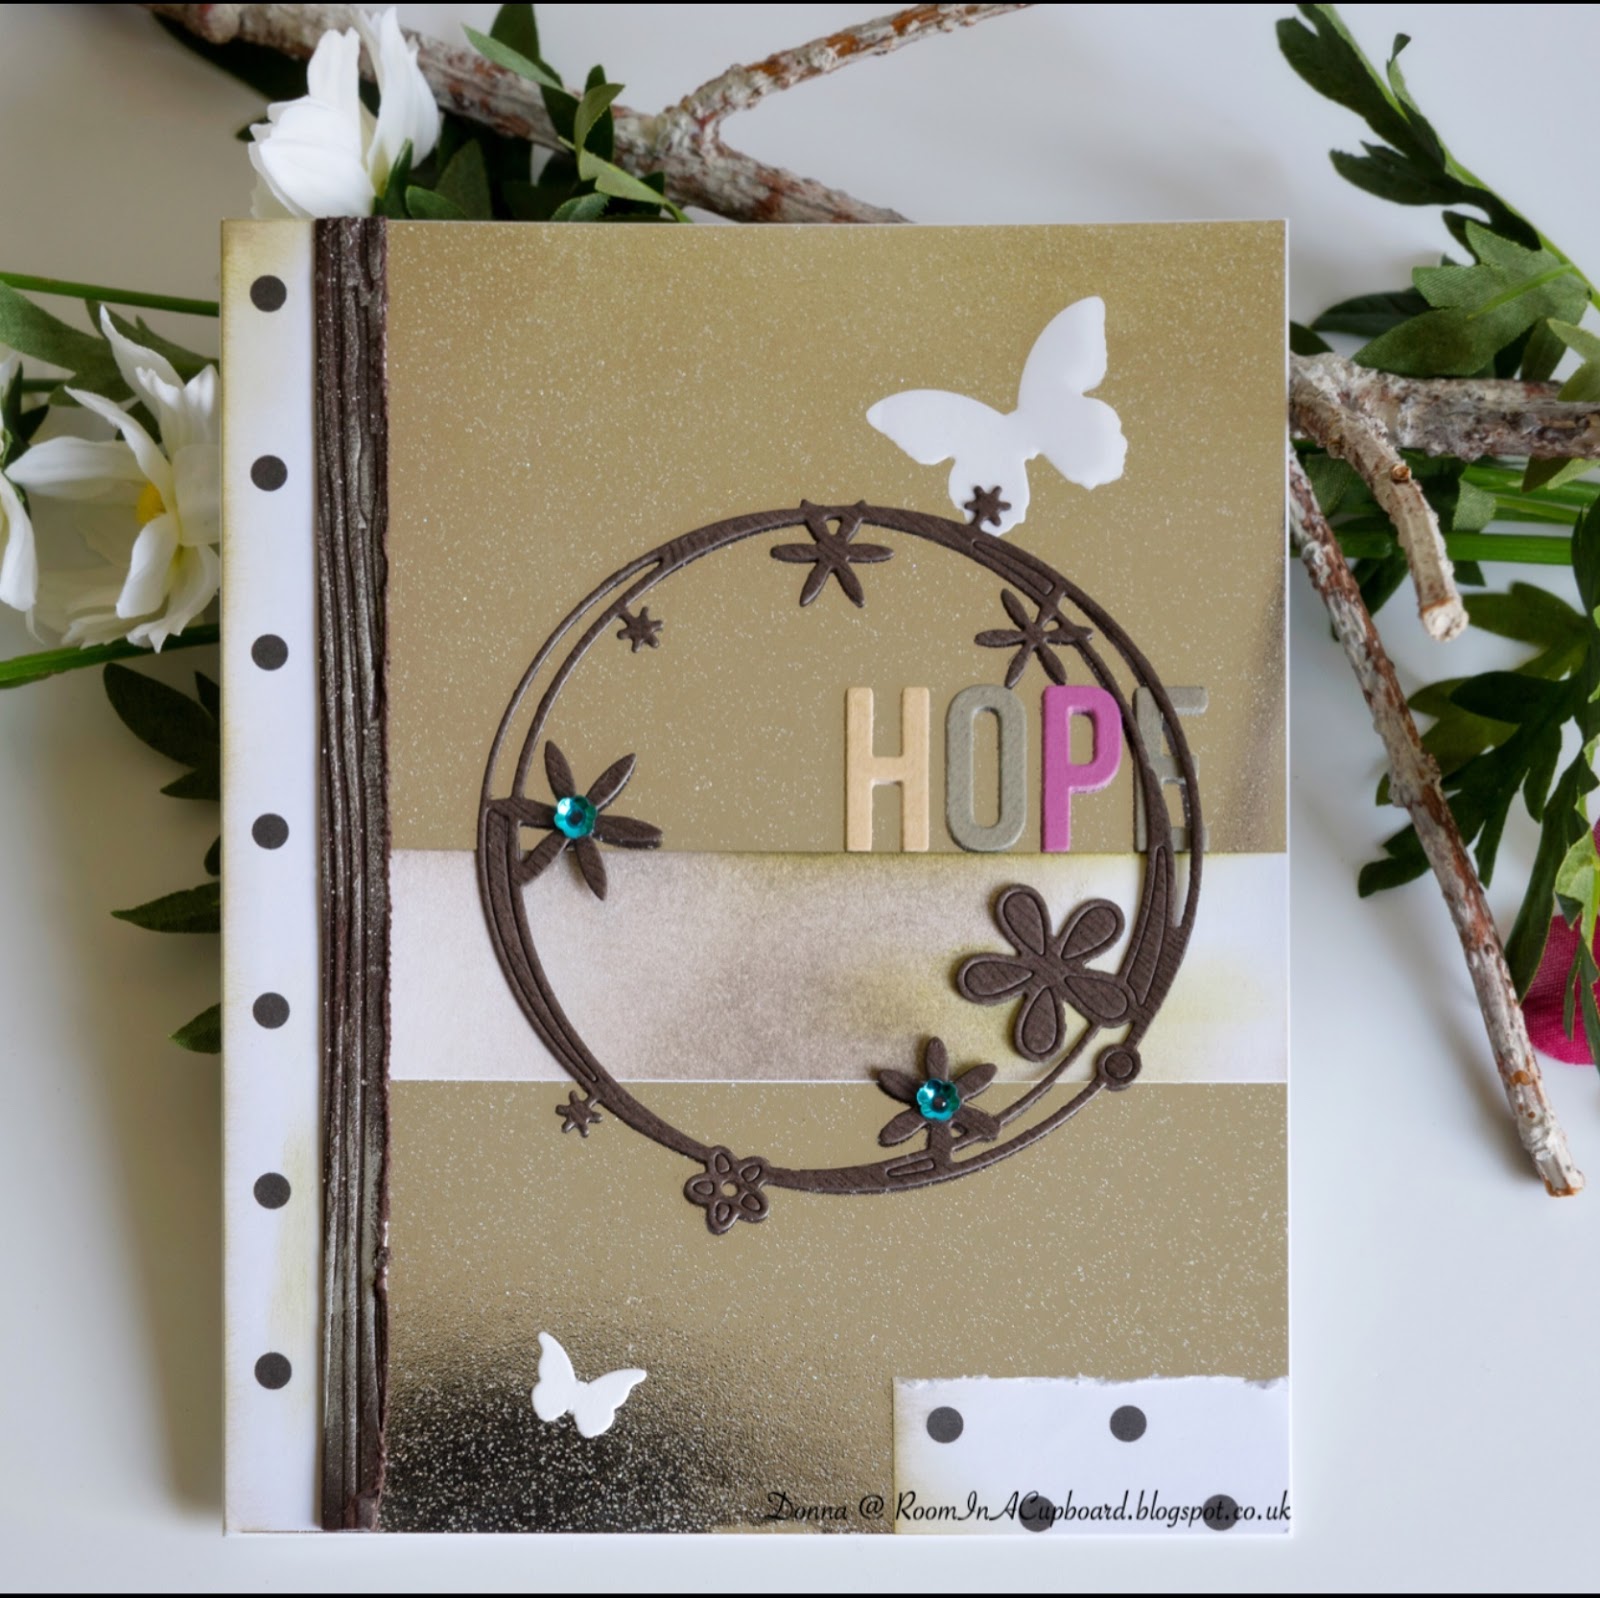
(Poppystamps) Scribble Flower Circle, Hope, Polka Dots

This is a simple offering of a 'very difficult to take a decent photo of' type of card...  but I'm not apologising as I love the effect!

But be honest...  can you tell that this is a card made entirely out of discarded bits and pieces from old projects?   I decided it was time to 'tackle that mountain' and put at least some of them to use!


*

I've added two close up shots...


*


And my first go at a photo breakdown of how this card was made...


Spraying this Crafter's Companion 'Spray and Sparkle'- Iridescent' gives a lovely mottled effect.  And if it's a 'less than pristine' piece of card it helps disguise those tiny scratches and fingermarks.  
That's a win in my book!


Here's a photo breakdown of the supplies I used. 
That scrap of wood effect card was embossed  (Crafter's Companion - Woodgrain Embossing Folder), then treated to a gilding wax polish before layering on that scrap of leftover spotty, dotty paper.  
The piece in the middle?  Left over from my Deer Frame project.  But I knew which inks I had used so they are included in this photo.
Plus a tiny scrap of spottiness in the corner - just because I can!
I did smoosh on some green inks to help give a more distressed look - and yes, I did succumb to using my distress tool just a little bit on that wood effect piece of card as well as the tiny piece in the corner.


Next I added the word HOPE from these two 'My Favourite Things' dies (Die-namics 'Happy Greetings' set.
Each letter was layered up four times for lots of dimension.


Then add one very lovely 'Poppystamps - Scribble Flower Circle'.
Notice how I haven't removed all of those tiny bits and pieces that you're supposed to poke out?
My circle die cut is from the 'Altenew - Woodgrain Bark' set of papers that they sell.  Mine were a blog win prize that I only had to pay the p&p for - which made them an affordable option.  But if I didn't have these papers and wanted to replicate this card any woodgrain embossing folder would do.
Then I simply added two tiny sequins...


The final step was the addition of these two butterflies.
The tiny one's cut from white card (Memory Box - Peaceful Butterfly Wings) and the larger has been cut from vellum using the 'Memory Box - Blissful Butterfly Border' die.
The only glue holding the vellum butterfly in place is a small smidge directly underneath that brown flower from the Poppystamps die.  Doing it this way gives just a tiny hint of added dimension as well as being a way to hide the glue on the vellum from view.


So what do you think?

Do you prefer my photo style explanation over the write up?

If you have the time, I would love to know.


This card doesn't actually use any Poppystamps border dies (and yes, I do have a lovely set of them), but I still think it fits the theme of this months challenge.
Homemade, scrappy borders can be just as effective if you pair them up with a beautiful die.

Well, that's what I think anyway!


*


Challenges I'm Entering...

PSC #35


Only Cards Challenge


Challenge #79  -  Anything Goes using Dies


#317  -  Wood Is Good


*

Thanks for stopping by today...

Donna. x