This is a simple offering of a 'very difficult to take a decent photo of' type of card... but I'm not apologising as I love the effect!
But be honest... can you tell that this is a card made entirely out of discarded bits and pieces from old projects? I decided it was time to 'tackle that mountain' and put at least some of them to use!
*
I've added two close up shots...


*
And my first go at a photo breakdown of how this card was made...

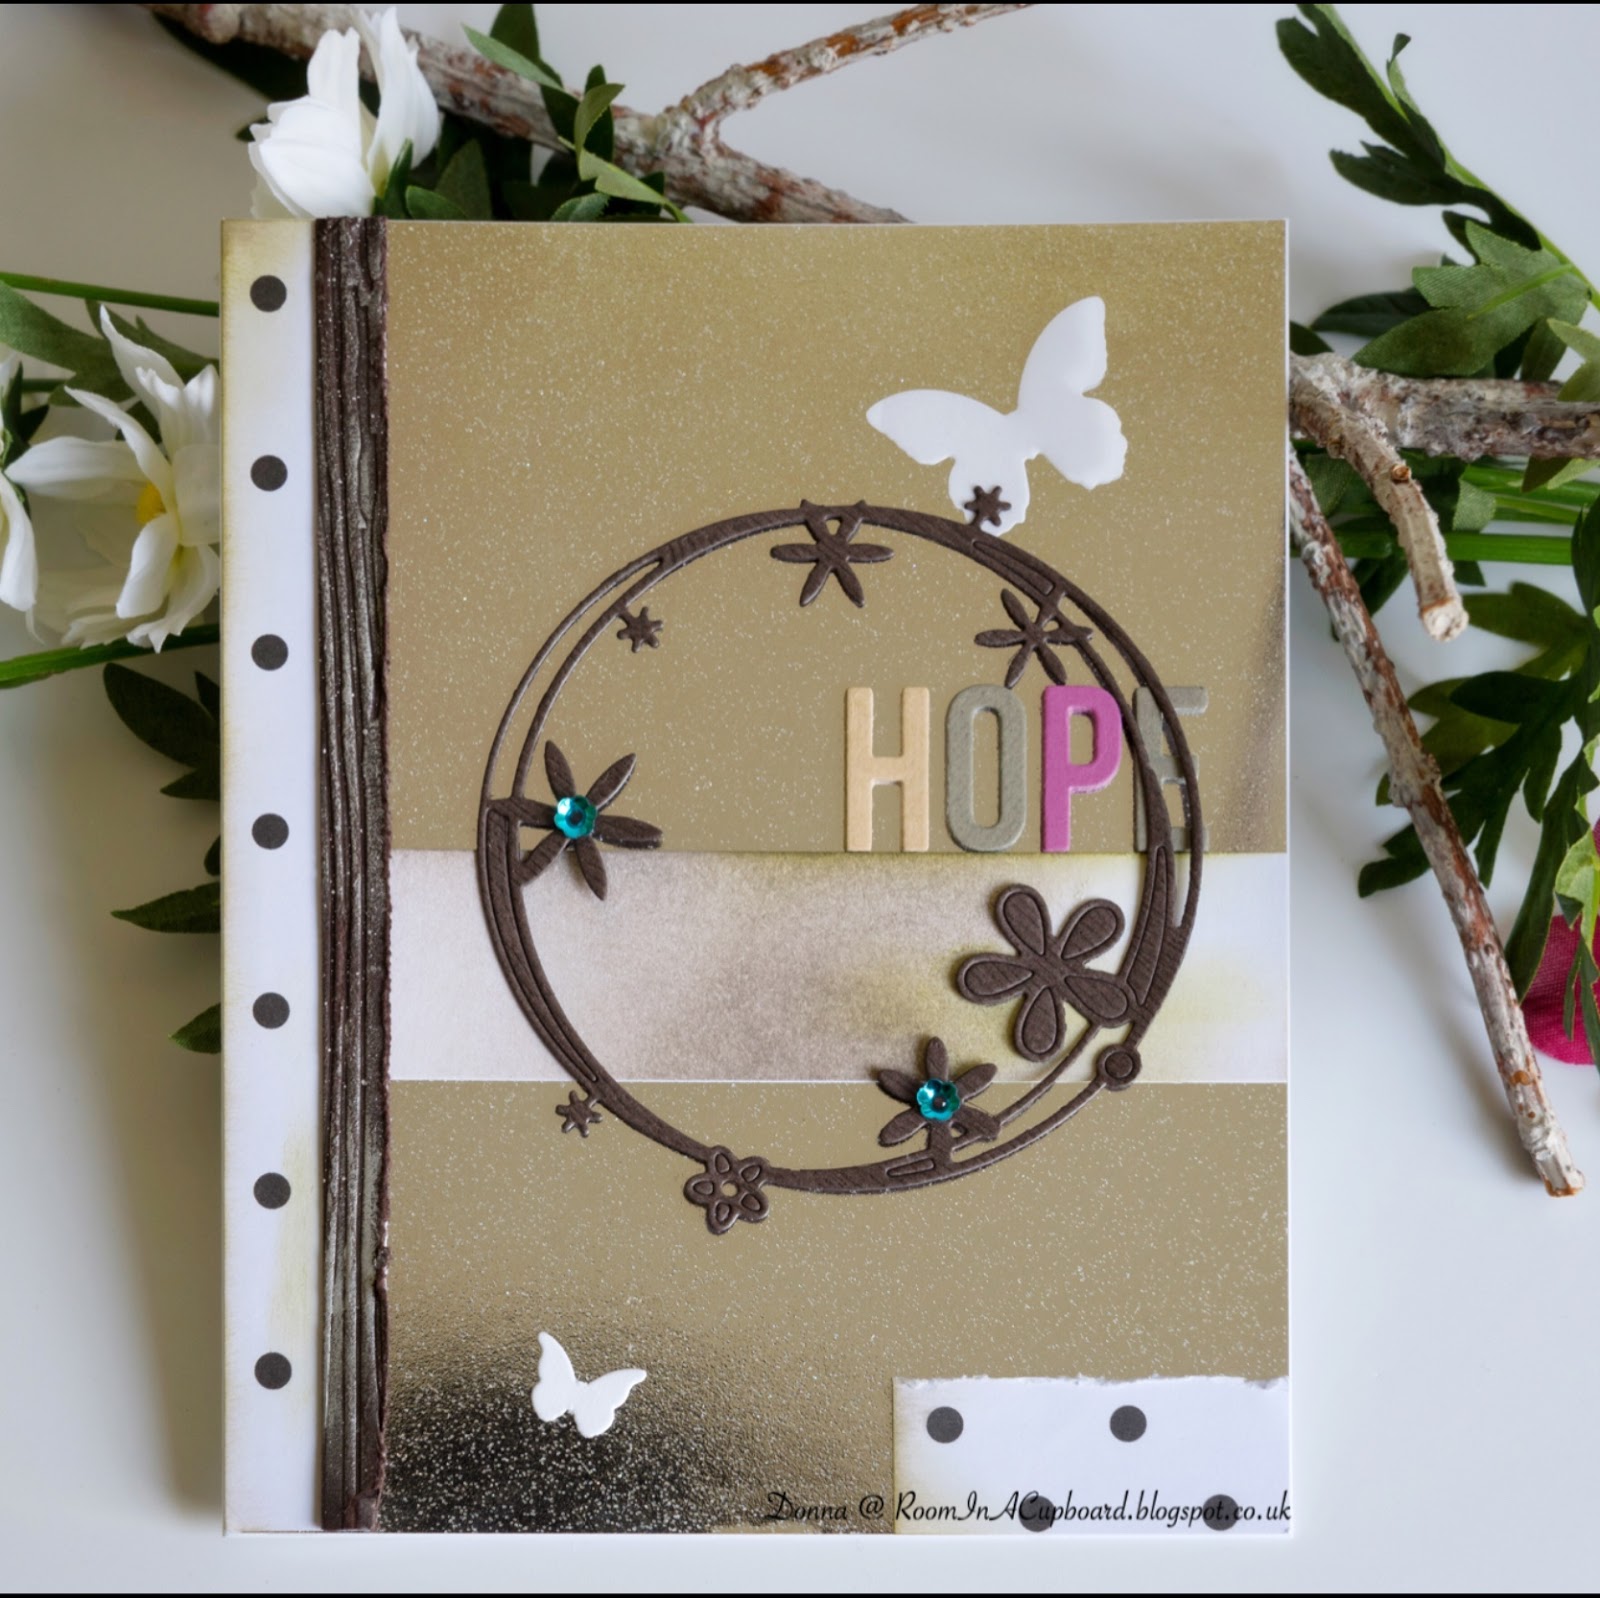
Spraying this Crafter's Companion 'Spray and Sparkle'- Iridescent' gives a lovely mottled effect. And if it's a 'less than pristine' piece of card it helps disguise those tiny scratches and fingermarks.
That's a win in my book!

Here's a photo breakdown of the supplies I used.
That scrap of wood effect card was embossed (Crafter's Companion - Woodgrain Embossing Folder), then treated to a gilding wax polish before layering on that scrap of leftover spotty, dotty paper.
The piece in the middle? Left over from my Deer Frame project. But I knew which inks I had used so they are included in this photo.
Plus a tiny scrap of spottiness in the corner - just because I can!
I did smoosh on some green inks to help give a more distressed look - and yes, I did succumb to using my distress tool just a little bit on that wood effect piece of card as well as the tiny piece in the corner.

Next I added the word HOPE from these two 'My Favourite Things' dies (Die-namics 'Happy Greetings' set.
Each letter was layered up four times for lots of dimension.

Then add one very lovely 'Poppystamps - Scribble Flower Circle'.
Notice how I haven't removed all of those tiny bits and pieces that you're supposed to poke out?
My circle die cut is from the 'Altenew - Woodgrain Bark' set of papers that they sell. Mine were a blog win prize that I only had to pay the p&p for - which made them an affordable option. But if I didn't have these papers and wanted to replicate this card any woodgrain embossing folder would do.
Then I simply added two tiny sequins...

The final step was the addition of these two butterflies.
The tiny one's cut from white card (Memory Box - Peaceful Butterfly Wings) and the larger has been cut from vellum using the 'Memory Box - Blissful Butterfly Border' die.
The only glue holding the vellum butterfly in place is a small smidge directly underneath that brown flower from the Poppystamps die. Doing it this way gives just a tiny hint of added dimension as well as being a way to hide the glue on the vellum from view.
So what do you think?
Do you prefer my photo style explanation over the write up?
If you have the time, I would love to know.
This card doesn't actually use any Poppystamps border dies (and yes, I do have a lovely set of them), but I still think it fits the theme of this months challenge.
Homemade, scrappy borders can be just as effective if you pair them up with a beautiful die.
Well, that's what I think anyway!
*
Challenges I'm Entering...
PSC #35

Only Cards Challenge

Challenge #79 - Anything Goes using Dies


#317 - Wood Is Good

*
Thanks for stopping by today...
Donna. x