Tuesday 23 October 2018

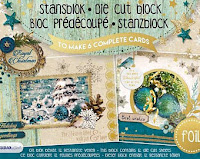
Cherish The Memory, Winter Trails, Collage Frame

I've created a Collage Framed Display Piece that could be reframed to display on a wall...
 or left 'as is' for either a card front or a box lid.


It's an 'Au Natural' design with just a hint of glitz from the gold star, brass watch surround, brass rings and silver gilding wax...


A far cry from its humble beginnings using the plastic netting from a pack of Baby Bels!


Hope you like it!


Here's a list of the Cherish The Memory Supplies used:


*


Studio Light


Winter Trails


*


Enjoy your day, my friends...


Donna. x

Wednesday 17 October 2018

Craft Consortium, Little Fawn and Friends, Best of Friends

If you succumbed to the beauty of the Little Fawn and Friends set for yourself  (scroll on down for the links if you aren't sure what I'm talking about)...  and IF you've cut into it and started using it yet...


...  then you'll soon see that you have lots of pretty little pieces of paper left over.


That's just what happens!


So today's post shares the last of my 'mini makes' with a quick idea on how to use up some of those little bits of paper...


As you can see, it also gives you a chance to use up some of those pretty bits of ribbon and twine you may have lying around!


If you look closely at the background you should see that I've even managed to find another way of using those tiny leaves that are part of one of the stamp sets.  
I've used Distress Embossing Powder with them as it gives a worn, weathered and muted look - which is just what I was after.


I've also mirror stamped the rodent, which has had a coat of varnish on after a touch of
water colouring!


Here's a list of the supplies used:


*


Little Fawn and Friends


Always and Forever


*


There really are so many ideas for using left over pieces of paper, aren't there?

Thanks for stopping by...


Donna. x

Tuesday 16 October 2018

Cherish The Memory, Winter Trails + Mintay, Christmas Stocking

I've mixed and matched several different papers to create an 8x8 card with a difference...


How long did it take you to spot it?!!


Of course, you could just as easily use the pocket in the stocking to hold a Gift Card...  it doesn't have to be cash!


Here's a list of the Cherish The Memory Supplies used:


*

Studio Light


Winter Trails


Royal Christmas


Classic Christmas


Mintay

Christmas Stories


As you can see, I've been 'messing with layers' again for this design...  cutting in to the backing sheets with craft dies from my collection as well as using craft dies in conjunction with the ephemera on the front.


With these beautiful papers, the only limit is what your imagination can do with them. 


*


Hope I've inspired you...


Donna. x

Monday 15 October 2018

8x8 Display Piece, 50th, Easel Backed

I was asked to make an Easel Backed 'Display Piece' for a 50th birthday...  and the theme was skulls, flowers, black, white and bubblegum pink.

Thank goodness for downloadable images is all I can say!


But do you know what?


I actually really enjoyed putting this design together...  once I had a game plan.


Here it is...


I thoroughly enjoyed 'messing with layers' and 'embracing the 'imperfectly perfect' for this design.


I did deviate a little from the design brief, though...  Can you tell that those die cuts are a deep, dark brown rather than a black?


*


The base has been inked using Distress Oxide (Black Soot), which I've then splattered with water and allowed to dry before adding Ranger/Distress Collage Medium - Crazing.

I've spray varnished flowers with silver glitter specks built in to the formula, added distressed edges,  silver gilding wax, gems and silver thread - and those flowers were inked up first using Tsukineko/Memento (Rose Bud).

There's even a touch of Tsukineko/Brilliance (Lightning Black) on the ragged sentiments. 


*


I'm entering this in to the following challenges:


LeighSBDesigns 31 Days of Halloween Blog Hop

bleedingartchallenge.blogspot.com


I do hope you like it as much as I do!


*


Donna. x

Monday 8 October 2018

Penny Black, Rustic Layered Scrolls Tag, Guest DT 2018

I've gone full circle with my final tag today by revisiting the bell I made for my first 
Guest DT post...


It's not quite the same as it's not 3D like the first bell and I've added some rust and scratched markings
(more details on that later).


And as you can see, this time the bell is just one of several elements I've used to decorate not one, but four layered scrolls...


I've kept the inking and colours used to a bare minimum as there's already a lot of detail on this tag.


Here's how it was made...


*


Cut out all of the main bell pieces from Christmassy in Matt Silver card stock.


Then cut out the main body of the tag again in White card and the tiny top and bottom ends of the bell in Metallic Copper (see photo)....  and leave to one side for now.


Using Ranger/Perfect Medium, stamp Winter Branches on to the silver body of the bell in small sections, heat embossing the first layer in Ranger/White Embossing Powder and the second layer in Holtz/Distress Embossing Powder (Walnut Stain).


Using a small piece of sanding paper, lightly sand the inner section of the bell on a diagonal (the piece the looks like a skinny oval with pointed ends). 

Then add some more Ranger/Perfect Medium along a small section of the edge (see photo) and more Holtz/Distress Embossing Powder (Walnut Stain) to create the illusion of rust.


Do the same to the main body of the bell, using the photo above as a guide.


Once cool and dry, assemble the bell as pictured - remembering to add the White bell layer underneath the bell and the brown top and bottom pieces of the die to the front...   and add a touch of Ranger/Stickles (Frosted Lace).


Then glue on a bow, cut from a Warm Gray card stock using Wreath Noel.


*


The Paper Scroll that the bell is wrapped around is the medium one out of set the three.

Cut 2 from White card stock and leave one to one side, inking the other with a gentle application of the following Holtz/Distress inks:


Stormy Sky
Broken China
Iced Spruce


Then, add the Enjoy The Wonder Of The Season sentiment using Tsukineko (Expresso Truffle) and the bird from Nature's Gifts - which has also been stamped in Tsukineko (Expresso Truffle) before being cut out and glued on.


 Next, cut out 2 more Bell 'top ends' (the hanging loops) from Silver card, glue those together and attach to the back of the inked up scroll...

... and add the White/blank Scroll layer underneath to reinforce strength.


Now simply attach some twine through the Bell loop first and the Scroll loop second...  and keeping the twine in position glue on the Bell.


Then add more Ranger/Stickles (Frosted Lace) to the Scroll and attach the Small Sprig from Christmassy - after inking it up with the following Holtz/Distress colours:


Mowed Lawn
Forest Moss


And finally (for now), add some foam pads to the back of the Scroll and leave to one side...


*


Cut out 2 more of the medium sized Scrolls and 4 of the largest size.

Glue together so that you have one more reinforced medium Scroll and two reinforced largest, then using a paint brush add some detail over the stitched side areas using the same
3 Tim Holtz/Distress colours as before:


Stormy Sky
Broken China
Iced Spruce


...  and leave these to one side to dry.


Cut out the Snowflake from Crystalline using Silver card stock for the top layer and White card stock for underneath...  and glue these two layers together.


Now cut out the Snowflake from Christmassy.
(Just like my last tag, I've actually used the inner tube section from a finished Kitchen Towel/Kitchen Roll for my Snowflake).

Then cut a second Snowflake from White card and glue it underneath, as once again you are reinforcing layers.


Now cut 3 Sprigs from Mitten Stocking, and ink them up using the following Distress colours:


Walnut Stain
Ground Expresso
Frayed Burlap


...  and once again, leave them to one side to dry.


Using just Versafine (Smokey Gray), stamp and cut out one Holly Leaf, a Berry Sprig and one single Berry from Cheerful Christmas, and cut them out.


*


Now comes the assembly line part...


Take the backings off the foam pads on the medium Scroll that's entwined with the bell, and attach it as shown to one of the largest Scroll pieces.


Add the Sprigs...

...  then the stamped and cut pieces (Holly and Berries)...


...  and then add the largest Snowflake from behind the Scroll at a slightly jaunty angle. 


Once that's all dry...


Add the next layer - the other largest Scroll...

...  and glue on the Snowflake.


And finally, add the last of the Scrolls (medium) into position.


Your finishing touches are to add some gems, a twine bow and some Ranger/Texture Paste.


*


And now comes a decision...

If you want to use this as an XL tag I would suggest cutting one more of the largest Scroll pieces out and gluing it from behind so that it runs parallel with the largest tag at the front.


OR


You could choose to stick this (just as it is) to a card base.


You see, I'm a great believer that tags have more uses than just as decoration for gifts or gift bags.

I think they can be just perfect as the focal point on a card, too!


*


Supplies used:


Penny Black/Dies

51-453      Christmassy
51-458     Paper Scroll
51-467     Wreath Noel
51-476     Crystalline
51-465     Mitten Stocking


Penny Black/Stamps

       40-637      Winter Branches
40-642     Cheerful Christmas
30-504     Christmas Sentiments
30-251     Nature's Gifts


*


I have so enjoyed the challenge of showing you just how versatile these beautiful stamps and dies can be.  


And I do so hope that I've inspired you in some small way.


Here's the link just one last time...

Click 'Here'


to see for yourself the Penny Black 2018 Christmas release.


I believe they have a 'Part 2' due out on 10th October!
So why not stop by at their blog for another fabulous reveal.


I've seen the sneak peaks already!


*


Donna. x

Monday 1 October 2018

Penny Black, XL Decorated Scroll Tag, Guest DT 2018

If you saw my last Penny Black post you will see that I'm building on my theme of adding layers and texture with this XL tag today...  and the beauty of it is, if you don't want/need the full size tag I've given you the option of just going with the round, smaller tag.


Two ideas in one!


This is my penultimate Winter/Christmas themed tag that I've designed as part of my Guest DT for Penny Black...


I do hope you've had the time to see their full 2018 Christmas release, but if not, please click on one of the two links above as it will take you straight to their online catalogue...


Here's my XL tag for today...


Now you may be wondering just why on earth you might need an XL tag, so here's a few ideas to get you started...


You've bought a BIG gift...  and a little tag would just be too small!

You've got lots to write and catch up on - and there wasn't enough room in the card or you forgot and you've already sealed it.

You want to add a photo to the back.

You want to use this tag to attach a gift card to.  
(Pretty tag.  Not so pretty gift card in envelope.  Attach the envelope to the back and seal it.  Problem solved).

Same idea as above, but this time it's actual money in the envelope.


And I'm sure there are many more ideas!


Below you'll see the step by step - divided into sections...


*


Let's start with that Robin...


Stamp Robin's Christmas in Versafine (Smokey Gray).
(You will need to stamp it twice, as Robin will be cut out of one to add dimension).  


Whether you cut before you colour or colour before you cut - that is entirely up to you.

I tend to favour cut before colouring simply because I hate the idea of putting all that effort into my water colouring, only to have my hand slip whilst cutting out.


With that in mind, cut out the Robin and then water colour using the following 
Tim Holtz/Distress inks:


Festive Berries
Aged Mahogany
Ground Expresso
Hickory Smoke


Add a layer of Ranger/Distress Collage Medium - Matt, and once dry glue on a tiny Black gem for the eye.


Then either turn Robin around and draw around the back of it on to a scrap piece of card 
and cut it out 

OR

Cut out a small circle (smaller than the robin) from scrap card.


Whichever you choose, glue this to the back of Robin so that it will have more dimension when attached to the tag.


*


Robin's background is a circle cut out from Robin's Christmas that has been very lightly colour washed using Holtz/Distress ink (Iced Spruce).


Cut out 3 sets of Holly Leaves from Xmas Poinsettia Cut Out, cut those apart and then colour using Holtz/Distress ink (Forest Moss).


Then glue Robin into position, add the Holly Leaves around the outside edge and trim off any excess foliage.


Add an edge/narrow frame cut from silver card stock, and then cut out 3 of the word 'Christmas' from the Holiday Edgers die cut set.
(I've cut my top layer from Warm Grey card stock and the bottom two from White scrap card).


Glue the 3 layers together, then glue into position as shown above.


If you are wanting to stop here and not proceed with making this in to an XL tag, please add another circle layer to the back for added durability.


THEN


You can either use a hole punch and make a hole for the twine 

OR

You can cut out 2 of the bell 'top parts' from Christmassy, glue those together and attach to the back of the tag before adding that second circle for extra strength.


If you are stopping here, don't forget to add the Ranger/Texture Paste now.
(Simply dip your finger in to the pot and smoosh on).

If you are not stopping here and want to proceed to the full XL tag, please wait until the end before applying the Texture Paste...


*


Die cut the largest die from Paper Scroll.
(Cut twice.  One needs to stay to one side).


Then, ink it up using the following Holtz/Distress colours:


Antique Linen
Old Paper
Pumice Stone


And once dry, glue the 2 layers together.


Next, cut a Snowflake from Crystalline and one from Christmassy.
(I've actually used the inner tube section from a finished Kitchen Towel/Kitchen Roll for my Snowflake and a small scrap of silver card for the other).  


*** (Doing my bit for the environment makes me happy)! ***


Then, cut out the longest string from Ornaments Kit... 
(I've cut mine from a Warm Grey coloured card stock)


...  and glue it on to the Scroll as shown above.


Followed by the Big Snowflake...


...  Then the Little Snowflake...


...  And finally that Circle with the Robin.


Then add Ranger/Texture Paste, Black enamel dots and punch a hole for the hanging loop.


*


You may be wondering just why I asked you to hold fire and wait until the end to add the
Texture Paste?


Truth is, I've learnt from experience that it's always better this way so that you can balance out just where you want to apply it.


*


Supplies used:


Penny Black/Stamp

40-647     Robin's Christmas


Penny Black/Dies

51-458     Paper Scroll
51-450     Ornaments Kit
51-476     Crystalline
51-453     Christmassy
51-448     Holiday edgers
51-474     Xmas Poinsettia Cut Out

*


Only one tag to go...


*


Donna. x