Showing posts with label Butterfly. Show all posts

Tuesday, 11 August 2020

Craft Consortium, Essential Craft Papers 'Bloom And Wild', Wall Art

 Craft Consortium have just released 4 new Paper Pads to join their 'Essentials' collection...  and I couldn't let that slip by without showing at least one of them to you as they are truly quite beautiful indeed...

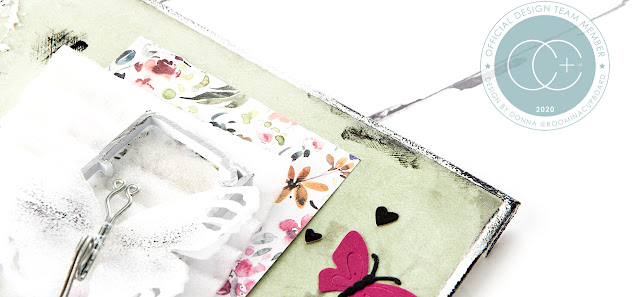
So here's just a taste of what 'Bloom and Wild' has to offer to you, paired up with the stunning Dienamix 'Enjoy Life' cutting die to create a Mixed Media bespoke piece of wall art with a hidden pocket behind for those things you just don't want to misplace...


*


https://www.craftconsortium.com/product-page/the-essential-craft-papers-bloom-wild


The Essential Craft Papers  - Bloom & Wild


 https://www.craftconsortium.com/product-page/dienamix-enjoy-life-cutting-die

Dienamix - Enjoy Life - Cutting Die


*


Hope you've enjoyed seeing my sneaky peek of this beautiful new paper pad.  Don't forget to stop by at Craft Consortium to see the other 3!


*


https://www.instagram.com/roominacupboard/

Donna. x

Friday, 8 May 2020

Craft Consortium, The Emporium, Botany (Framed)

You may have noticed that I have a particular fondness for making framed pictures.  As such, I'm often trying to come up with new ways to 'reinvent the wheel' I guess!

I can't help it!  There's just something about building a scene within a frame that I absolutely love.


Here's todays offering...


I've primarily used  Craft Consortium papers, but there are a few wooden embellishments here, along with a brown 'fretwork ' piece using card from my own stash of supplies.

See how I've varied things up and added to the Mixed Media feel just by adding a flower cut from The Essential Craft Papers Wooden Textures collection..?


*


Tuesday, 18 June 2019

Craft Consortium, The Essential Craft Papers, Strawberry Fields

If you have seen the Essential Craft Papers (sold by Craft Consortium) you will already know that there are a number of beautifully designed 'fake textures' to choose from.

And what's more, they are incredible versatile and can be used in so many different ways...


I've opted for a 3D project. 

(No surprise there.  I love making 3D projects.  More time consuming than some other paper crafts, perhaps...  but such fun to make as it all begins to take shape)!


I've primarily used the Grunge Tones that come in both Light and Dark...


...   But there are a few other papers in there, too!  Wood Textures for the punnet, Metal Effects for the table post and Tropical Paradise for the table top itself!  I know you can't see the table top in these photos so I'll tell you which Tropical Paradise paper I chose to use...  the one with the pineapples on! 
   (It made perfect sense to me as I was combining a fruit and garden theme)!


I've used a number of 3D craft dies for this project.
Some have been cut from card that has had the paper glued on first, whilst others have simply had two layers of paper glued back to back.


Then some elements have had Collage Medium applied to them, whilst others have been Varnished (spray can).


Once all was glued into place I've simply added some Mixed Media 'distressing' using Twinkling H20's (Mica Watercolour) and Sparkle Medium (Glitter Gel Paste).


I really do hope this helps you to catch a good glimpse of at least some of the many different papers on offer.
You'll be spoilt for choice once you've seen them all!


*


Craft Consortium

Essential Paper Pads


*


Thanks so much for stopping by!

Donna

Friday, 26 April 2019

Tag You're It, Selective Colouring

It's Tag You're It Friday time!


The theme for this challenge is 'Selective Colouring', which is super easy to do...


I've simply stamped a grunge partial background in Memento Gray Flannel and then gone over part of the stamp with a touch of Tuxedo Black.  

The butterfly has also been coloured using Memento Markers...
As it's a grunge effect I wasn't overly worried about the left and right hand sides not matching perfectly.
  Close enough is just fine for this technique! 


Simply colour and stamp using a Stamp Positioner Tool and once happy leave the ink to settle in to the paper for a while before spraying with water.
(Leaving the ink to settle before spraying means that the colours will soften but the ink won't bleed so much).

Once dry, I've gone over the black stem with my marker pen so that it 'pops out' a bit more, then left it to dry again before adding three separate layers of Tim Holtz Distress Collage Medium/Crazing.


Then add a suitable sentiment, spray lightly with varnish and once dry, attach the butterfly.


It really couldn't be much easier than that!


I do so hope you will stop by and join us in our 'just for fun' challenge.

The winner does get the opportunity to Guest Design with us!


Donna. x

Wednesday, 20 March 2019

Poppystamps, Challenge Reminder, Miss You

There's still time to join in with the Poppystamps challenge for this month...

PSC#54, Spring Cleaning.


Here's my DT project for the challenge.


As this is a CAS card it's very simple to make...  but if you would like to pop on over to the challenge blog for details (and/or a list of supplies used), please click Here and the link will take you straight to the post!


*


Thanks so much for stopping by today...


*

Friday, 8 March 2019

Tag You're It, St Patrick's Day/Birthday

I'm here with a reminder post for the current Tag You're It challenge...


...  and mine comes with a twist!

After all, people do have their birthday's at all times of year!


Here's my tag...


... And here's the challenge theme.


Can you see what I've done?


I've taken the three leaf clover element from the challenge theme and used that as the basis of a Happy Birthday tag.

The three leaf clover design has been taken from Pinterest.

I've simply added the heat embossed stamping, splatters and a few die cuts to brighten it up.


There's still time to join us at Tag You're It!


Hope to see you there.


*


Donna. x

Monday, 15 October 2018

8x8 Display Piece, 50th, Easel Backed

I was asked to make an Easel Backed 'Display Piece' for a 50th birthday...  and the theme was skulls, flowers, black, white and bubblegum pink.

Thank goodness for downloadable images is all I can say!


But do you know what?


I actually really enjoyed putting this design together...  once I had a game plan.


Here it is...


I thoroughly enjoyed 'messing with layers' and 'embracing the 'imperfectly perfect' for this design.


I did deviate a little from the design brief, though...  Can you tell that those die cuts are a deep, dark brown rather than a black?


*


The base has been inked using Distress Oxide (Black Soot), which I've then splattered with water and allowed to dry before adding Ranger/Distress Collage Medium - Crazing.

I've spray varnished flowers with silver glitter specks built in to the formula, added distressed edges,  silver gilding wax, gems and silver thread - and those flowers were inked up first using Tsukineko/Memento (Rose Bud).

There's even a touch of Tsukineko/Brilliance (Lightning Black) on the ragged sentiments. 


*


I'm entering this in to the following challenges:


LeighSBDesigns 31 Days of Halloween Blog Hop

bleedingartchallenge.blogspot.com


I do hope you like it as much as I do!


*


Donna. x

Thursday, 30 August 2018

Cherish The Memory, Framed Ephemera, Garden Theme...

If you stumbled across my last post for Cherish The Memory you will know that I made a Wrapped Journal with a difference as the pages were made from passport protector covers.


Why?

 To help store all of the ephemera that I have in mind for future projects.


As a continuation of that theme (I'm using the same style ephemera, but I've mixed it up a bit with nuts and bolts, etc from another collection) I've created a piece of wall art that I hope captures a sense of 
'being in a garden/a beautiful outdoor space'.


Take a look...


*


Supplies Used...


Lemoncraft


StudioLight


*


Rather than use foam pads, I alter depth and perception on my projects by simply layering up glued die cuts...


...  And if it's a piece of ephemera I want to layer up?

 I cut scraps of card and glue those to the back instead.


*


I hope I've inspired you to get out your stash today!


* 


Donna. x