Showing posts with label Taylored Expressions. Show all posts

Tuesday, 11 July 2017

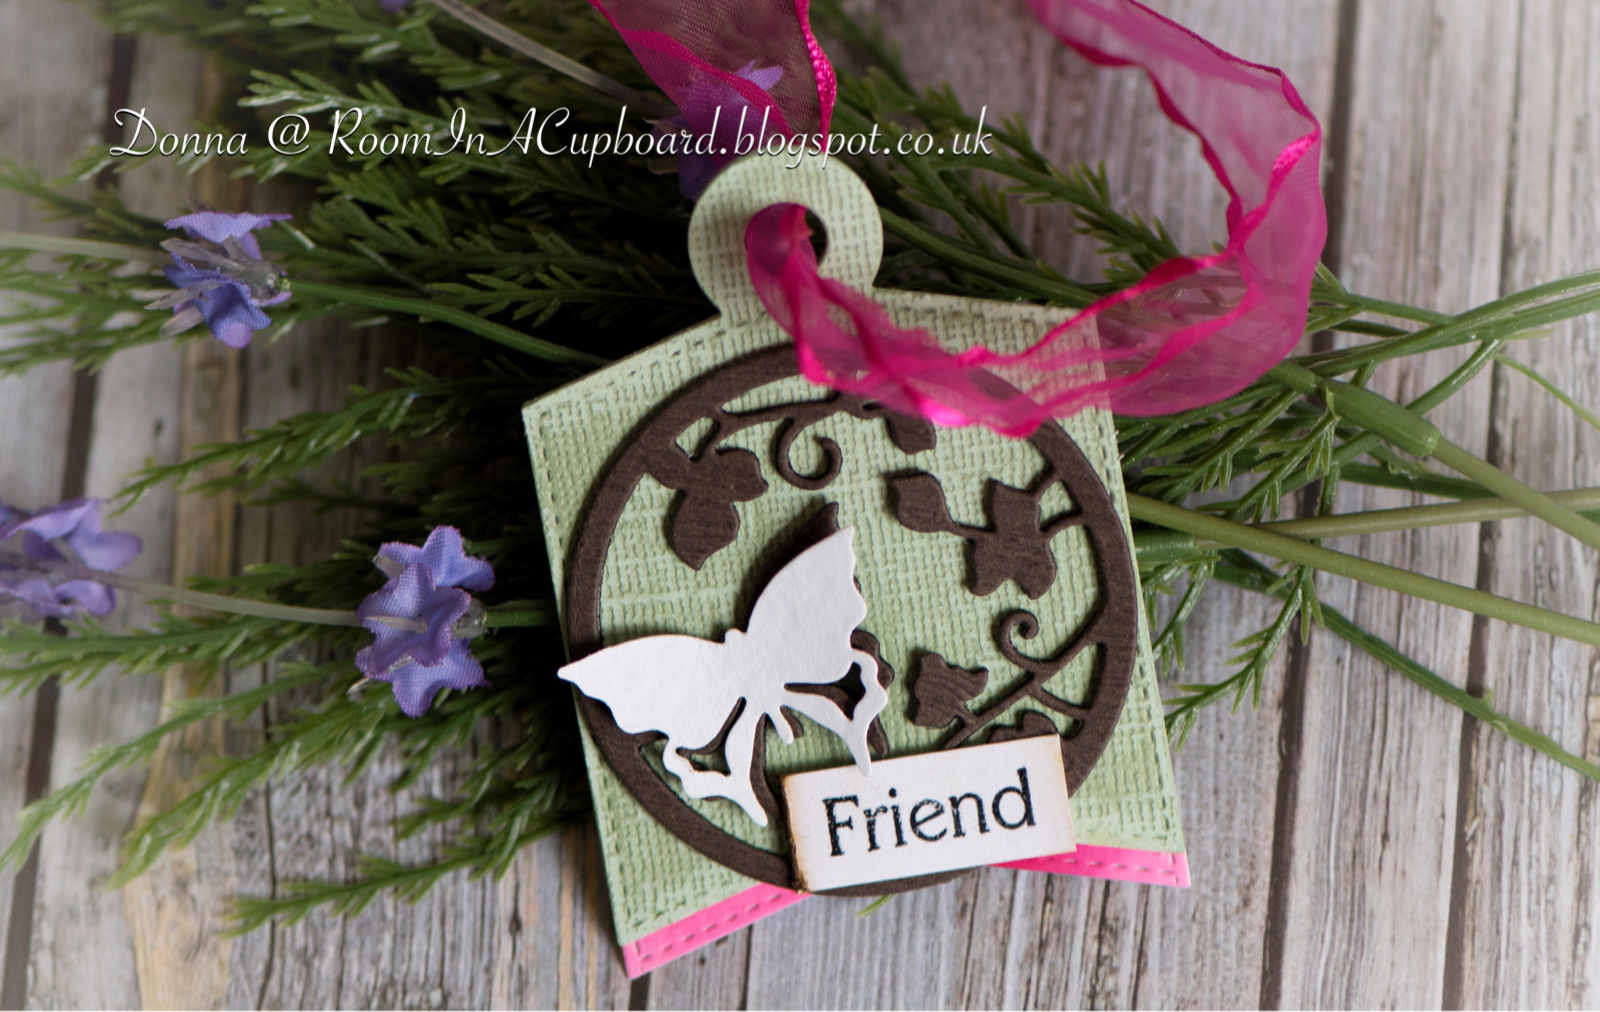
Butterfly Tag Card, Garden Theme, Friend

I made this 'tag' card a while ago but just haven't got 'round to posting it until today.
The inspiration for it came from a photo set up I used when posting this tag part alone on a recent blog post for a past Tag You're It challenge/my DT take on the Featured Artist.

It's a 'busy' card...  


(Apologies for the slight blur on this photo.  It's a real close up shot - but I wanted you to see the texture from sanding down a piece of Core'dinations card stock).


I seem to be in a habit of making busy cards right now - and I don't honestly know how I feel about that.  
Do people like busy cards (generally speaking) or is it a bit like a pizza with too many toppings?

But at least I've been sticking with my nature theme.  

Speaking of which...

Have you had any 'fluff puffs' in your garden?

Now you may be wondering just what a 'fluff puff' is.
Well...  they are fluffy and they're puffy and they sort of 'flitter' their wings in such a cute little way right before being fed.
And 'fluff puff' just suits them so much better than 'fledgling' when they are at their cute stage.

What am I talking about?
Baby sparrows.
Apparently in decline...   unless you come to our garden.  
Then you'll see staged feeding frenzies of activity, group dust bath sessions...
A sight of pure cuteness.

I'm sorry to say that one fledgling got misplaced by it's dad for a whole 10 minutes on the first brood of this season.
How do I know?
Because I heard it calling out for the entire duration - and then looked out of the window to watch it.  If you've heard a sparrow calling at feeding time you'll recognise the sound as it's a single, solitary (fairly high pitched) 'cheep' noise that's as long as the silence in between the 'cheeps'.  
(If I had to hazard a guess I would say a second per 'cheep')?
The poor little darling kept hopping around on the ground  - and at one point it made its way over to two slightly older girls...  and opened its beak in readiness for food as they moved a little closer - to fly off!
10 minutes must have seemed like a very long time...  and it didn't once stop calling out until found!

...  And we're on brood three right now by the looks of things.

But I digress...


So what did I use to make this card?


Supplies Used:

Dies:
MFT/Die-namics Tag Builder - Blueprints 4
Taylored Expressions 'Beauty Lies Within'
Memory Box 'Blissful Butterfly Border'
Memory Box 'Tall Grassy Stems Left Corner'
Papertrey Ink 'Wet Paint Cuts'

Martha Stewart Punches:
 'Pop Up' Butterfly Border
Cherry Blossom Trim

Memory Box Stencils:
Delphinium
Stems

Holtz/Distress Ink:
Dusty Concord
Seedless Preserves
Milled Lavender
Victorian Velvet
Bundled Sage
Forest Moss
Mowed Lawn
Walnut Stain

Other:
Stamp from stash
Twine - Natural
Ribbon
Glitter Card Stock
Distressing Tool
Sand Paper


Challenges I'm Entering...

(All scraps except the green tag base).


'Distress It'
(Sanded Core'dinations Card Stock + Partially/Slightly Distressed Edges)


(Challenge #76  -  Layers)


'Anything Goes'


I'm still in catch up mode right now, but I'm getting there.
Thank you so much for your kind words of support...

Donna. x

Friday, 2 June 2017

Butterfly Tag, MFT Blueprints 4, Friend

Happy Friday to you.

I have a small tag to share for the new challenge that starts today over at Tag You're It.
Hope you like it...


With this background setup for the photo the gears in my head are already spinning on how this little tag will become a future card someday!

I just love the fact that tags can make a basis for unusual card designs, and whilst I can appreciate that they won't always be to everyone's liking I just can't seem to help but love making them.

You see for me, creating something 'cohesive' on such a small scale is still a learning curve.
But I embrace that challenge each and every time as I'm convinced that it'll help me to become a better crafter.

I guess we all have our areas that we focus on in the hopes of improving, don't we?


My inspiration for today's new challenge came from this...


...  so I went with the intricate inlay theme and tried to keep my design as simple as possible.
And on the plus side, it also gave me a chance to play with a die that I've had in my collection for a very long time.

Don't forget, we've moved to a monthly format now - so that's more time to play along if you decide to join us.

Hope you do...

Donna. x

Thursday, 27 April 2017

Office Worker Leaving Card, Shirt + Tie, Personalised

One of my husband's work colleagues is leaving next week after a fair few years of service...  considering how quickly some of them leave by comparison, in any case!

He will be missed as he's worked closely with Hubby for years, so I wanted to make a very 'individual', personalised leaving card that included some of those elements that would have been part of his daily work life.

Whether this is inspired or insane, it's currently making its way 'round the office.
They seem to like it, at least!
Want to see?


It's an 8x8 huge beastie of a card...  

8x8's use to scare the pants off me, but now I'm less intimidated by them than I used to be.
You see, I'm a fan of Sheri Gilson's work...

Sheri is a woman who seems to instinctively know what colours, patterns, textures, embellishments and layers will work together and if you look at her work you will often see 'finished' panels that stand their own ground as fully finished pieces.
She somehow knits these panels into a bigger and always perfectly balanced design that's a real feast for the eyes...  and unbeknown to me, I think her influence in making these panels is beginning to rub off a little.
I will never hold a candle to her work, but that's ok.
I'm still grateful for the inspiration...

That's not to say that I enjoy making 8x8's yet though as I often hit a 'sticking point' towards the end and lament the fact that I should have chosen a CAS design!
(Yeah, like they're so easy...  
...  That's irony - just in case you weren't sure!)

Now before I forget I should also thank Marybeth for sharing a link on her blog a while back about these dollar bill 'folding shirts'.
Of course, being in the UK meant that an actual dollar bill wouldn't work for this design, but as Hubby has a stash I 'borrowed' one for dimensions and cut some thin paper to use instead.
(...  and I've kept the dollar bill for future craft use - obviously)!


So what 'work elements' can you see on this card?
The answer should be two business cards and two spreadsheet tables of sorts.
I've torn, inked over, partially covered and even butchered down to just a teeny tiny logo in one case, then covered one with Distress Collage Medium 'Crazing', one with the same Medium in 'Vintage' and one in 'Matt'.
These 'print offs' were not on the best quality paper (hence the Collage Medium treatment) so one was spray mounted onto a second piece of paper and the other onto thin card.  
(And if you're wondering why the butchered logo got the 'Vintage' treatment it's because the colour of the business card didn't work with the rest of my design).

A stamped image of a laptop would have been perfect for this, but alas I don't have one and had to make do with the pencil pot instead.
I'm thinking I should email Mr Holtz with a plea for a 'techie' line of this style stamps.
I need a laptop stamp, you see!

So what else have I used on this card?


Supplies Used:

Dies:
Marianne Design Collectables 'Tab With Text'
Taylored Expressions 'Little Bits - Neckties'
Poppystamps 'Classic Ribbons'

Holtz/Distress Inks:
 Stormy Sky
Black Soot
Pumice Stone
Spiced Marmalade
Vintage Photo

Other Ink:
Memento/Tsukineko 'Tuxedo Black'
Ranger Perfect Medium

Embossing Folders:
Sizzix Texture Fades 'Notebook'
Spellbinders 'Fabric Weave'

Stencils:
Holtz 'Splatters'
The Crafter's Workshop 'Coffee Splotch'
Memory Box 'Texture Line Up'

Stamp:
Stampers Anonymous/Holtz 'Schoolhouse Blueprint'

Distress Collage Mediums:
Crazing
Vintage 
Matt

Other:
Staple
Paperclips
Patterned Paper


Challenges I'm Entering...

(We've Got Your Number)
The numbers might be oh so very tiny, but they are there!


(Anything Goes)


Allsorts Challenge
(Week #142 - I Spy...  'B')
'B' is for Business Card, 'B' is for Brown


Mix It Up
(Just For Fun)


Make My Monday
(Challenge #44 - Embossing: Heat or Dry)


Thank you so much for brightening my day...

Donna. x

Wednesday, 23 November 2016

Christmas Tag, 'Stag In Aperture', Decorative

My tag for Day 5 of Tracey's 25 Days of Christmas tags is another I made purely for decoration only.
I haven't done that before this year, but sometimes dies are just far too pretty to write on, don't you think?

Here's my tag...


I love Tracey's idea of adding bells to the top of her tags.
Thank you, Tracey. x


My inspiration came from this duo of stag heads...


Supplies Used:

Dies:
Mama Elephant 'Tags A Lot'
Taylored Expressions 'Birch Tree Accessories Set'
Memory Box 'Holly Vine''

Other:
Altenew 'Woodgrain Bark' paper
Bell
Natural Twine
Gems - Red
Spectrum Noir Sparkle Pen - Clear Overlay


(Before I forget to say, I did marry up dies to the back of this tag to cover up the glue marks.  I can't have a horrible splodgy mess showing on the back now, can I)?!!


I'm afraid my blog posts are like trains again today.  You wait ages for one to turn up and then several do all in quick succession!

I have one more post to squeeze in for today...

If you are reading through these quick bite sized blog posts -
Thank You...

Donna. x

Tuesday, 20 October 2015

Snow Globe/Stag, Aperture, Female

I was fortunate enough to win a Guest spot on the Design Team at City Crafter a few weeks ago and was over the moon at the theme I was scheduled to play along with for this week.
'Into The Wood' couldn't be more perfect for me as I adore making nature themed cards.  
But the rules were very clear..  Include 'wood' somehow in the design, but NO TREE!!!

My plan from the beginning involved the Stag and Snow Globe die along with the Woodgrain embossing folders.
As for the rest...  that was more trial and error.   That's often the way it goes for me (having a partial design in mind that I then have to 'play' with).  I don't know about you!

Here's the card...


My aim (please feel free to tell me if it worked or not) was to create a pretty 'girly' card that wasn't overtly girly.  Does that make sense?  I also purposefully chose the whole 'brown' look, but still wanted to achieve a CAS 'feel' to the design.  Clean and Simple meets Layered meets Aperture...

Dies used:
Taylored Expressions 'Birch Tree Accessory Set' (Stag)
Memory Box 'Large Snow Globe'
Marianne Design Collectables 'Tab With Text'
Memory Box 'Holly Vine'
Impression Obsession 'Pine Branch'
Open Studio 'Snowglobe Bases'

Embossing Folders:
Sizzix/Texture Fades 'Woodgrain' (Background)
Crafter's Companion 'Woodgrain' (Snow Globe Base)
Cuttlebug 'Snowflakes'

Stencil:
Memory Box 'Splatter Spray'

Gluing two cards together and then adding inner panels is a favourite trick of mine for aperture cards, but it does add to the weight quite a bit...  so these cards are generally reserved for hand delivery only.

(I generally console myself with the fact that at least they are sturdy rather than flimsy)!

A bow with a bell attached and three vanilla/champagne Morning Dew Drops...  and this card was done...

...  except for this...


I cant't wait to see what you design if you decide to play along :)


Challenges I'm entering...


(Monochrome or Colour...  and Why?)

I like the challenge of getting a Monochrome card to 'work' for me.


(Add Texture and/or Colour Inspiration)

I chose to add texture.  


The Sisterhood of Crafters
(Die-lirious and Punchy)


Crafty Hazelnut's Patterned Paper Challenge

Creative Card Crew
(Challenge #98 'Ribbon')


Pixie's Crafty Snippets Challenge

My patterned paper and stag were both cut from my snippets stash.


(SSC112)


(Challenge #130 'Christmas to Die for')


Cas-UAL Chic
(CCC04)

Stencilling, Die Cutting, Embossing.


Hope you are having a good week so far...
My thoughts are with those of you I know are having a rough time right now.


Monday, 8 June 2015

Christmas, Stag, Muted Colour Tones

A completely new Christmas Card challenge site began running a short while ago and today I've decided to take the plunge by playing along.  After all, we're almost half way through the year people!


I have to say I'm quite pleased that this card would suit a man or a woman equally well.
I would love to say that that was my intention all along, but I would be lying.  Cards for men are not my strong suit at all :(

To begin with, I used my Memory Box 'Drop Ornament' as I wanted to echo the fact that a strong main shape was a huge feature of the design inspiration post.

Next, I echoed the snow with my Cuttlebug Snowflakes embossing folder.  Rather than cut my snow slope freehand I used the Drop Ornament again.  I don't really know why from from the word 'go' I knew that my design would focus around the Drop Ornament rather than in it.

I just love the stag from my Taylored Expressions, Birch tree Accessory Set.  I've paired it with the Fir Tree set from Impression Obsession, Star of Wonder (Memory Box), Christmas Baubles (Poppystamps) and some additional snowflakes from my Martha Stewart/All Over The Page 'Aspen Flurry'.

I don't know if you can tell from the picture but the stag and the medium sized fir tree have been mounted on foam pads for added dimension.  I should probably also mention (as the picture does not capture it at all) that other than the snowflake embossed background, the top of the ornament and the white snowflakes, everything else (including the card base) has been cut from Centura card.  I'm slowly growing fond of it's subtle shimmery effect :)

Do you like the embossing on my fir trees?  I used my Sizzix/Alterations Pine Branch folder for this. I haven't used this folder before today but I like the effect :)

Some grass from a very hard to get hold of (not to mention very expensive) Martha Stewart/Edge Punch (again procured from the USA)...

And that's one card ready for Christmas:)

Here's the design that was used as inspiration...


As you can see, I digressed from a purely white on white card.  I still haven't tried one of those as yet!

Why don't you try playing along with the next MUSE: Christmas Visions challenge?

'Bye for now...

Donna.

Saturday, 18 April 2015

Double Tag, Serendipity Bird Frame, Bird House

I had a lot of fun with the last tag I made for a Tag You're It and Poppystamps challenge.  So much so that I've been mulling over a second design that would suit both challenges.

Here's the design I came up with...


It's predominantly made from my 'left overs' stash.  Do you have one of those?  It's the place where all my extra pieces go...  Normally because I've cut a few extra or I've cut the same die piece in a few different colours as I couldn't settle on which one I wanted to use.

The front tag has been cut from Kraft card and sponged with several shades of green, blue and brown from my Tim Holtz distress ink collection.  There's even some Antique Linen in there!

The Serendipity Bird Frame (Poppystamps) has been backed onto Centura Card.  The tiny leaves were left from my McGill Dimensional Lever Punch (Tree Branch) and the flowers were sent to me with a craft order.  Any tiny daisy punch would do the trick, I think.

Once I added the Poppystamps Nestled Bird (cut from recycled packaging), the Delicate Chain (Poppystamps) and the birdhouse (Taylored Expressions, Birch Tree Accessories Set), it was simply a case of deciding on which flower embellishment centres I wanted to use.   Can you see from the picture that I pierced a hole into the birdhouse and attached the chain through that, then cut into the chain to thread it onto the frame?

Once the twine was added the tag was finished, but I still felt it lacked something.  I considered adding a butterfly, making a bigger tag and backing it onto this one as a frame...  and then I remembered a double tag I had seen online some time ago.  I figured writing on the back of a 3D tag might not be the easiest of options, so this seemed like the perfect solution.

So I untied the twine and cut the back tag from Centura card to mirror the front design a little.  As I wasn't sure if Centura card was practical to write on I cut a distressed rectangle (Spellbinders) from hammer card, edged it slightly with Walnut Stain Distress ink and added a few extra daisies.

If you take a look at the Tag You're It design (below) that's posted by their Featured Designer, you'll see that this time around I've focused solely on the bird and flowers as the focus of my project.


I'm also entering this into Country View Challenges / Use Kraft card.

Yes, it was a lot of work for such a small project.  But I had fun doing it.

Bye for now  :)