Showing posts with label Shaker. Show all posts

Friday, 21 September 2018

Craft Consortium, Little Fawn and Friends, Squirrel Shaker Card

If you saw my post yesterday you will know that my mini card featured a much paler, much grayer squirrel stretching out to reach a pine cone...


Well, today's little cutie isn't doing that at all.

He's far more interested in trying to catch a falling leaf...  or perhaps a snowflake or two!


This is a shaker style card that uses a piece of patterned paper from the Little Fawn and Friends premium paper pad in the background.


I've stamped and fussy cut leaves as well as water colouring them - and squirrel too, of course!


And once again I'm sharing one of the newest colours from the A4 non shedding glitter card collection - as well as varying sizes of gems.


*


Craft Consortium 


Always & Forever 


*


Don't forget, Little Fawn and Friends will be available to purchase from

29th September, 2018.


Craft Consortium


*


Donna. x

Monday, 13 November 2017

Craft Consortium, Winter Woodland, Stamped Robin/Window Shaker Tag

Have you seen the Flocking Powder that Craft Consortium sell?

My project for today focuses on whether or not Flocking Powder can be used as snow in a shaker - and the answer (to cut to the chase of it) is 'yes' and 'no'...

Confused?

Let me explain...

Yes, it does work.  
It's light and fluffy and white and it produces a lovely snowy effect - but because it's so light and fluffy it tends to stick rather than 'free fall'.

The solution is very simple.  

Mix in something coarser like glitter or small sequins from your stash... 
and you've got the best of both worlds!


I just love the fact that the Flocking Powder adds a more natural look to the 'snow'.

What do you think?


Here's a breakdown of how this was made...


*


You'll need two of these -
both covered in Decoupage paper using spray adhesive as the glue.

Take the windows out of the one and add a layer of acetate to the reverse side - 
using red liner tape to attach.

(Don't forget to add the hanging holes  - not pictured here)!

Keep the windows in the other and leave to one side for now.


You'll need four of these. 

Cut out and disregard all of the inner frameworks as shown, then ink around all edges of each frame (inside and out) in a colour that suits your Decoupage papers.

(Important - Add the hanging holes NOW before doing this next step)!

Glue one to the back of the Decoupage acetate window piece...
and the other three glue to each other to form a thick 'sandwich'.


You'll need just one of these!

I prefer to stamp out the image before cutting the card to size.
(I've used watercolour card and distress inks, then added some Glossy Accents to the berries and a very light splattering of white paint as 'snow').

Once this is dry and cut to size, simply attach to the back Decoupaged window piece of card.

Then add the sandwiched Window into place, followed by your Flock Powder mix, followed by your front acetate Window.

Add some weight on top (I generally use my cutting plates stack or some old stamp blocks) and leave to dry.


As for the topper?
That's from the packaging of the paper pad, fussy cut and layered up before adding lots of pearls and just a hint of...  you guessed it!
 Flocking Powder.


I've sprayed my topper (from the paper pad inner front cover) with a few coats of varnish and left it to dry before gluing it into place.
One Split Ring (from my own personal stash), some Twine and an Acorn Charm were all that was needed to finish...


*


Craft Consortium supplies used:

Winter Woodland

Always & Forever
Adhesive Pearls - 3mm

Decoupage Paper
This particular design is no longer in stock...  but they have plenty more to choose from!

*

Other supplies used:

Distress Ink
Peeled Paint
Broken China
Stormy Sky
Fired Brick
Festive Berries
Forest Moss
Twisted Citron
Ground Expresso
Frayed Burlap
Walnut Stain
Hickory Smoke

Distress Paint
Picket Fence

Frantage
Shaved Ice
Crystal

Stampin' Up
Chalk Marker

Ranger
Glossy Accents


*


So there you have it.

That's one more Decoupage paper project done and dusted...
but I have plans for more!


Stay warm...


Donna. x

Thursday, 26 October 2017

Craft Consortium, Winter Woodland, Hedgehog Shaker Tag

I have a very quick Craft Consortium post to share with you all today...

a hedgehog shaker tag!


Aren't these little guys just the cutest?


I've included a photo breakdown of the steps used to make it...


*


Cut hedgehog patterned paper to size and mount on a piece of kraft card.
Next, add the stitched circle and glue it into place over the top of the image.  
Then cut out extra hedgehogs and glue into place to add dimension.


Next, cut another piece of Kraft card to size and add the aperture (stitched circle cut out).
Frame using single strands of twine.
(I used red liner tape to hold these in position).


Glue a thin silver glitter card frame into position that's an exact match in size to your base layer with the hedgehogs on.  Then secure these two layers together and leave to one side.
(This is your base layer).


Make a frame that's very slightly smaller in size to your base layer.
Attach silver ribbon to the back of it (I cut my lengths of ribbon in half), then add a layer of acetate - also to the back.
Glue cut out flowers and leaves into position.
(These flowers have been treated to a layer of diluted White Pearl Glue prior to using.  It adds a lovely sheen to the paper).


Next, make two other frames that are exactly the same size as the one you just made above.

Add another layer of acetate to one of these frames - only this time add the acetate to the front, NOT the back.  (I used red liner tape for this part).
Using Silver Pearl Glue, add a thin layer all around the outside edge where the acetate meets the frame.  (Apply glue with your finger).
Leave to dry.

 Trim down the other frame from the outside edge and carefully apply Silver Pearl Glue to this one, too - only this time cover the inner as well as the outer edge.


Once dry, assemble these three layers together - thinest on top, followed by acetate covered in Pearl Glue, followed by acetate with flowers and leaves on.
But don't do that yet!
You need to remember to add your cut out 'shaker' leaves before you put these three layers together!

Once assembled, add more Silver Pearl Glue around the outside edges if you so wish.


Add a hanging loop into place...
and attach to the base section you made earlier.
(I used foam pads).


*


You will notice in that last picture that I've shown you what this looks like as just a plain shaker frame.
It would be equally perfect with a black and white photo in it - don't you think?


*

Craft Consortium supplies used:

Winter Woodland

*

Other supplies used:
Acetate
Stitched Circle die.
Red Liner Tape.

*


Enjoy your day...

Donna. x

Wednesday, 10 August 2016

Shaker Box, Caterpillar on Branch, Wood Effect

 I've been on a bit of a recycling/upcycling mission this past few weeks - reusing acetate and cardboard packaging on my last tag AND on today's craft project.

You see, crafting costs a small fortune.  We all know it does.  But then many hobbies do.
So if I can cut costs AND do something that's good for the environment, well then...  I'm just going to go ahead and do it.
I encourage you to do the same.  You've not got much to lose if it was heading for the recycling bin anyways!
(I'm just going to pretend you all recycle.  It's none of my business whether you actually do or not). 


Anyhow...


This month's Poppystamps challenge has been delightfully called 'Shake It Up'.
I wanted to play along, so I got out my Poppystamps dies, (well actually, I got out the 'cut outs' of my Poppystamps dies) and played around with a few ideas before settling on one design.
One design that morphed into something else en route!  Heck, it morphed so much it's not even a card anymore!
You're no longer surprised by that, are you?


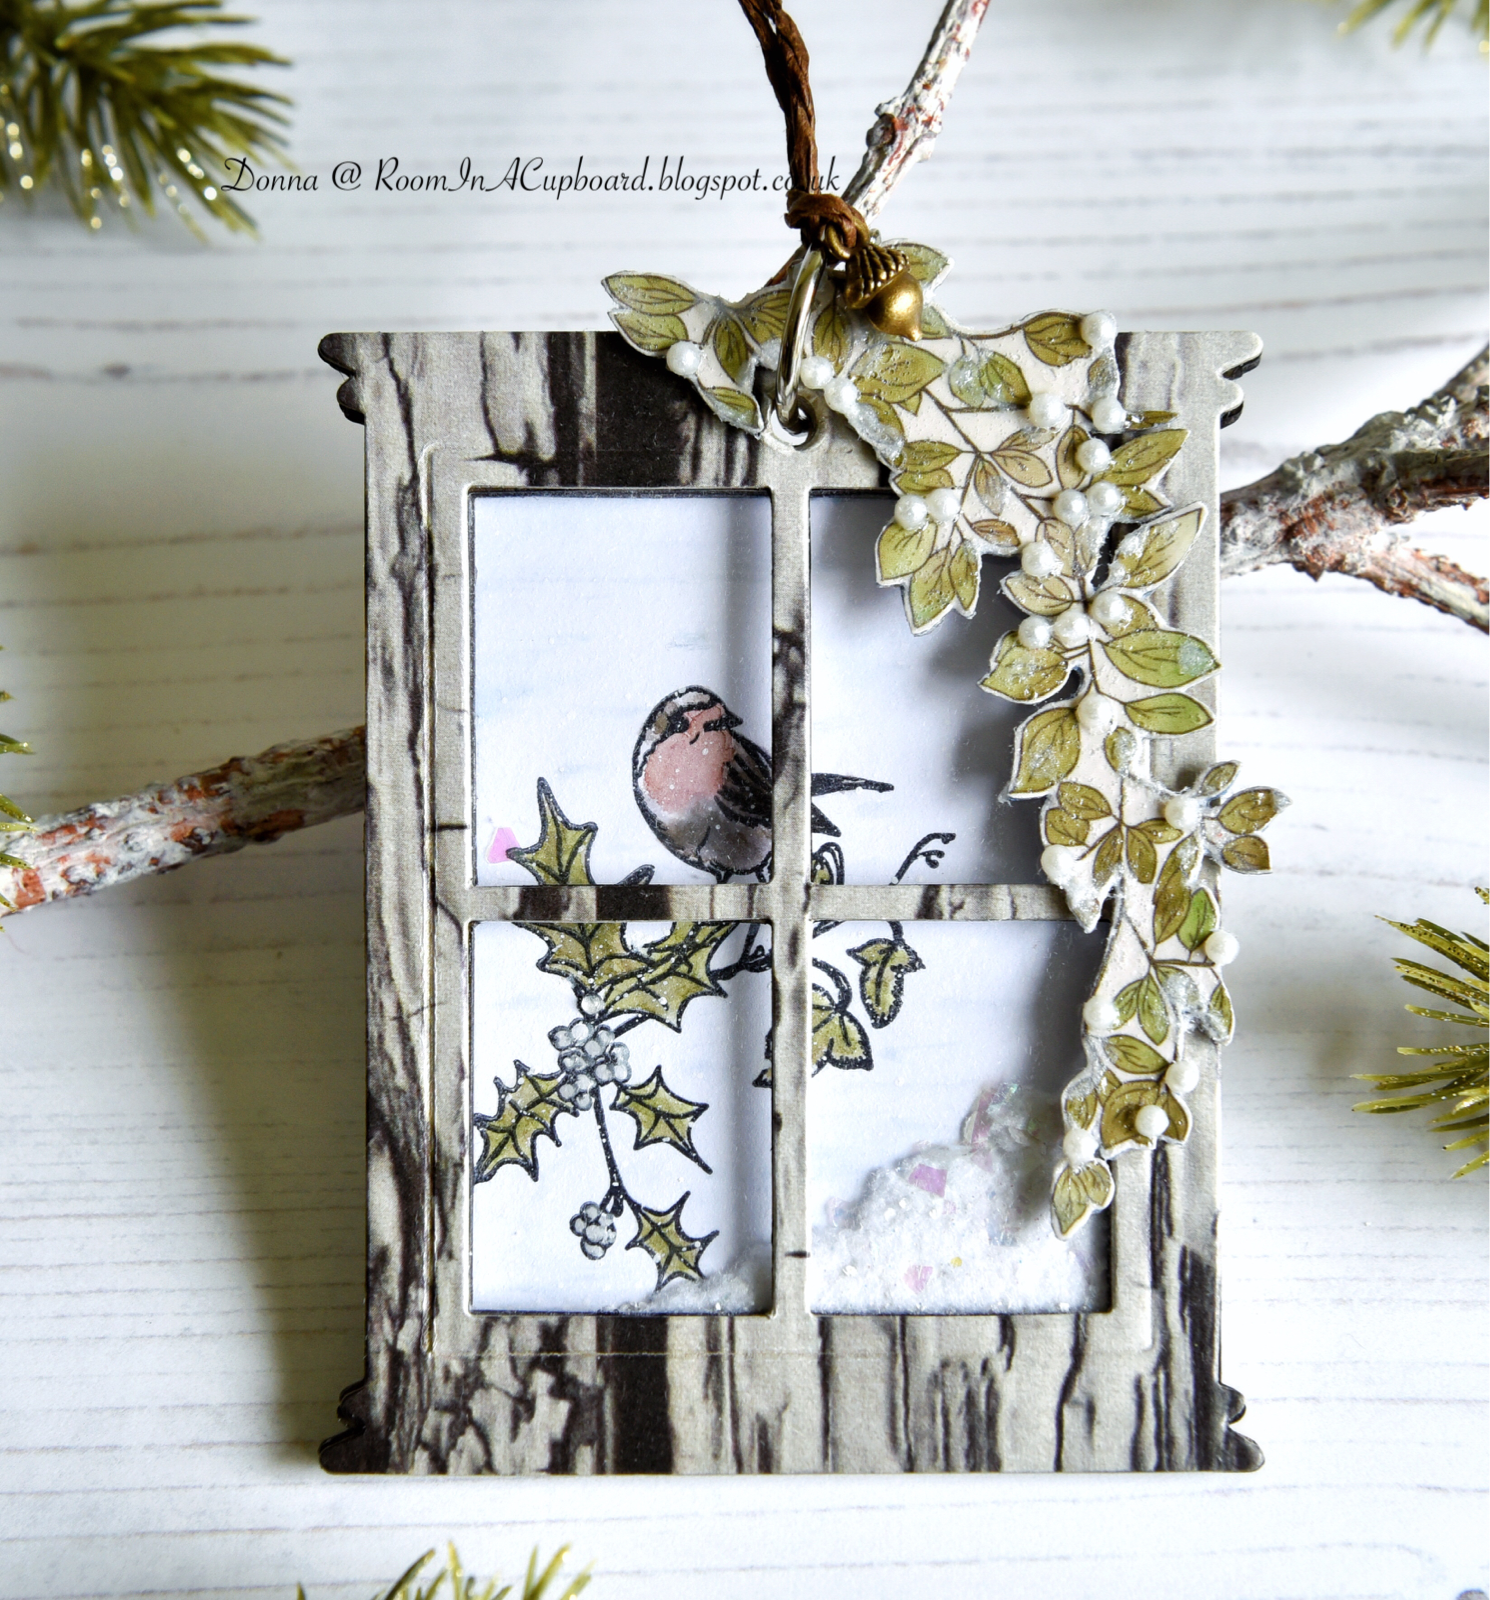
Let me show you what I've ended up with...


...  and one close up shot...


I've taken a few photo's as it's really the only way to give you any idea of what it looks like underneath the Nail Glitter/Flower Soft 'snow'.
Have you noticed that those three pink Flower Gems don't seem to have moved at all?  You would be spot on if you had.  I glued them into place on the Brusho background as they were far too integral to the design to shake around wherever they please!

This is a very 'girly' design, isn't it?   Would you give it to an adult, or only a child? 

I have to be honest and say I've never spot coloured with Glossy Accents before.  
I'll leave it to you to tell me whether this was inspired or insane.  (My husband certainly doesn't like it one little bit.  He likened it to something I shan't mention in case you are eating right now.  Let's just say I have similar thoughts every time I look at my bottle of Stickles 'Sprinkled Sugar')!

Did any of you noticed that my branch isn't embossed and want to know how I managed that?

Sizzix have a range of Embossing Diffuser sets that have aperture's set into them.  I used the Circle from Set #1 to effectively 'mask off' the branch from being embossed along with the rest of the card.  Just something else to add to that busy/plain balance I was striving for.

I guess I should tell you which part of this box lid uses recycled cardboard as the acetate's pretty obvious, isn't it?!
See that spotty/snowy base that everything else is glued on to?  It's been recycled from that super shiny cardboard you so often get with Embossing Folders.  
After using Spray Mount to attach some White Card to the back of this pretty piece of shiny card, I cut it into shape (Tattered Lace Box Die) and then ran it through the machine with my 'Snow' Embossing Folder.  And then I gently sanded it!
I just love this technique.  It's super easy and very effective...  and I'll be using it again closer to Christmas as I still have a little of this repurposed card left.  Yay!

A tiny touch of Stickles underneath the two Silver Gems, Flowers, Leaves, Blue Gems and a touch of Distressing and Black Ink around the edges...  and this was finished.
Except that I now had to make the box base!


Supplies Used:

Dies:
Poppystamps 'Cute Caterpillar'
Poppystamps 'Quiet Bird Sash'
Poppystamps 'Dogwood Blossoms'
Poppystamps 'Meadow Leaf'

Embossing Folders:
Sizzix/Texture Fades 'Woodgrain'
 Crafter's Companion 'Snow'

Ink:
Holtz/Distress 'Black Soot'

Other:
Brusho  'Grey'
FlowerSoft  'Polar White'
Ranger/Stickles  'Sprinkled Sugar'
Ranger 'Glossy Accents'
Flower Gems
Gems
Nail Glitter 


Challenges I'm Entering...

(Apart from the Recycled Card and the White Card needed to make the box base, it's all snippets)


(Try To Contain Yourself)


Thank you so much for stopping by today...

Donna. x