Showing posts with label Winter Woodland. Show all posts

Tuesday, 18 December 2018

Craft Consortium, Winter Woodland, Don't Worry Be Happy Keepsake Journal

 I'm using papers and toppers from the gorgeous Winter Woodland collection in combination with the 'Vintage Emporium' Essential Craft Papers for today's Craft Consortium project...

A 'Don't Worry Be Happy' journal  - with a difference.


Every page has a pocket or an envelope on one side to store away a mini memento. 

And on the other side it's been left blank so you can glue in bigger pieces if you so wish.


Hope you like it!


I won't show you every page on the inside, but here's a few - just to give you an idea...


*


Craft Consortium

Supplies used:


*

Thanks so much for stopping by today...


Donna. x

Monday, 26 November 2018

Craft Consortium, Winter Woodland, Christmas Table Decoration

I thought it might be nice to revisit last years release of the Winter Woodland collection and pair it with some of the the new Essential Craft Papers by Craft Consortium.


With the addition of some decoupage papers for the base, here's what I came up with...


I have to say, I do just adore this robin!


If you are feeling inspired to have a go at something similar, here's a list of the Craft Consortium supplies that I used...


*


Craft Consortium

Winter Woodland


The Essential Craft Papers


Decoupage Paper


Little Fawn and Friends


Always and Forever


*


Thanks for stopping by...


Wednesday, 29 November 2017

Craft Consortium, Winter Woodland, Decoupage + Squirrel Clock Face

Good morning, everyone!
It's another cold and frosty one here in the UK, and as anyone who knows me can tell you - I am no fan of the cold.

So I've turned things around for this project today using just one topper from Craft Consortium's Winter Woodland collection - just because it says Winter doesn't mean that's all you have to use it for!


But if you don't like squirrels you should look away 'round about...  now!


For those of you that do love them, however...
Isn't this just the sweetest topper ever?

And such a good size, too.


Such a cutie deserved pride of place on my project for today, so I placed it slap bang in the middle of this clock face.

And why not?


Take a look 'round the back...

See, it has an easel backing that folds flat - which means that this could easily be given instead of a card.
Just attach a label and write 'Happy Birthday' on it or something...


I don't get 'cards' like this...  
so maybe I should squirrel this one away (tee hee) and keep it for myself?

What do you think?


*

Craft Consortium supplies used:

Winter Woodland

Always & Forever

Santoro - Kori Kumi
Leaf Ribbon Set

Decoupage Paper
Seaspray
Metallic Copper


*


As always, I've attached my decoupage papers using spray adhesive.


Here's a closer look at the bottom layer... 


Can you see how I scrumpled up that clock face Decoupage paper to get that crackle effect?


I also smeared brown ink all over the front, left it for a minute or two and then wiped it all off.
Why?

Because the ink seeps into the creases and tones down the shine.
I'm a muted kind of shine girl by nature, you know!


Want to see some more inspiration?

Tune in to Create and Craft TV (11am UK time) today.
That's 29th November, 2017. 
I'm pretty sure I've even heard that there's a sale on! 
(If you are reading this at a later date - sorry, you've missed it)!


But maybe next time...


Donna. x

Tuesday, 28 November 2017

Craft Consortium, Winter Woodland, Decoupage + Twine Christmas Card

I just love the Tartan Decoupage Paper that Craft Consortium sells, so for today's project 
I combined it with the wonderfully illustrated Winter Woodland paper pad...
...  and some of the front cover... 
...  inside front cover...
...  lace, twine, ribbon, toppers, resin flowers and a leaf.  

And I've thrown in some stitched die detailing, fussy cutting and distressed edges all for good measure.

This girl likes to add texture to her layered work, you know!


Here's a small breakdown of the base layer before I added the tag, twine and resin embellishments...


*


Start of with the Decoupage paper cut to size and glue into place.

Then cut the smaller square of white patterned paper.  (Acorn and Blue Berry Sprig) to size...  but DO NOT glue it down yet!

Cut a piece of Deer paper to the same size as the Acorn and Blue Berry Sprig, then using that piece of paper cut out two partial Stitched Circles shapes - using dies from your stash.  
Then glue this piece to the Acorn piece.

Cut a further partial Circle from the front cover of the paper pad and glue that into place as shown.

Once dry...

Distress the edges and glue into place on the card front.


Then...

Add a smaller Stitched Circle as shown top right.

Nest, cut a thin rectangular strip from the inside of the front packaging to size, add lace to it and then glue it into place as shown.

Then add the fussy cut Green Trailing topper, followed by an even smaller die cut Circle bottom left.


*


The rest should be self explanatory, but please feel free to email me if you have any questions...


I always use spray adhesive when adding decoupage papers to my craft work - with the exception of the first base layer on this card.

Why was this layer treated differently?

Because I wanted that 'loose edge' look, so I chose to use wet glue far away from that outside edge - knowing full well that it would be covered by those smaller square layers.

(There's a method to my madness, you know)!


*

Craft Consortium supplies used:

Winter Woodland

Decoupage Papers:

*

Other

Stitched Circle Die
Spray Adhesive
Wet Glue


*


I do hope that my 'out of the box' thinking with the twine being used as an embellishment hasn't scared you off!


Enjoy your day...


Donna. x

Monday, 27 November 2017

Craft Consortium, Winter Woodland, Squirrel Scene.

My project for todays Craft Consortium post was only going to look like this initially...


...  and it was going to be just a small, cute card - made using the 'oh so very gorgeous' papers from the Winter Woodland collection.


But then I got to thinking about those play scenes I used to have as a child that came with vinyl type removable sticker pieces...

...  And then I thought about how popular the 'Walking In A Winter Wonderland' theme is at this time of year...

...  And before I knew it...

... I'd made this!


Let me show you...


Obviously you can customise the wording and the toppers to suit...  or just keep it as the original idea of a small, cute card.  

Either way, it hopefully helps to give you a really good look at some of the pretty toppers that are included.  
(These are hidden away inside the double front cover of the paper pad).


*

Craft Consortium supples used:

Winter Woodland
Premium Paper Pad
Metal Vintage Acorn Charms

Always & Forever
Metallic Ribbons - Silver


*


Thanks so much for stopping by today.

Enjoy your week...


Donna. x

Tuesday, 21 November 2017

Craft Consortium, Winter Woodland, 8x8 Floral Deer Card

8x8 cards...

Whether you love to make them or loathe to make them, they have their place...   so today's offering I'm sharing with you all is a simple idea using packaging and papers from Craft Consortium's Winter Woodland collection.


Hope you like it!


*


 Craft Consortium supplies used:

Winter Woodland

Decoupage Papers

*


Other
Stitched Square Die
Stitched Circle Die


*


Want a few quick tips on how this was put together?


Most people will have a square frame die in their collection somewhere...
So I made the frame from one square frame die and then trimmed the edges to size as that's easier for me then 'phaffing' with nesting dies!  
(Then I just layered it up three times to keep the layers down as big 8x8 cards don't appreciate lots of weight on the front).

Cutting out the random hole on the bottom left helps to carry on the pattern from the right but somehow makes it look less busy than simply cutting out a circle and gluing it on.  
It's all about messing with layers... 


Thanks for stopping by today...


Donna. x

Monday, 13 November 2017

Craft Consortium, Winter Woodland, Stamped Robin/Window Shaker Tag

Have you seen the Flocking Powder that Craft Consortium sell?

My project for today focuses on whether or not Flocking Powder can be used as snow in a shaker - and the answer (to cut to the chase of it) is 'yes' and 'no'...

Confused?

Let me explain...

Yes, it does work.  
It's light and fluffy and white and it produces a lovely snowy effect - but because it's so light and fluffy it tends to stick rather than 'free fall'.

The solution is very simple.  

Mix in something coarser like glitter or small sequins from your stash... 
and you've got the best of both worlds!


I just love the fact that the Flocking Powder adds a more natural look to the 'snow'.

What do you think?


Here's a breakdown of how this was made...


*


You'll need two of these -
both covered in Decoupage paper using spray adhesive as the glue.

Take the windows out of the one and add a layer of acetate to the reverse side - 
using red liner tape to attach.

(Don't forget to add the hanging holes  - not pictured here)!

Keep the windows in the other and leave to one side for now.


You'll need four of these. 

Cut out and disregard all of the inner frameworks as shown, then ink around all edges of each frame (inside and out) in a colour that suits your Decoupage papers.

(Important - Add the hanging holes NOW before doing this next step)!

Glue one to the back of the Decoupage acetate window piece...
and the other three glue to each other to form a thick 'sandwich'.


You'll need just one of these!

I prefer to stamp out the image before cutting the card to size.
(I've used watercolour card and distress inks, then added some Glossy Accents to the berries and a very light splattering of white paint as 'snow').

Once this is dry and cut to size, simply attach to the back Decoupaged window piece of card.

Then add the sandwiched Window into place, followed by your Flock Powder mix, followed by your front acetate Window.

Add some weight on top (I generally use my cutting plates stack or some old stamp blocks) and leave to dry.


As for the topper?
That's from the packaging of the paper pad, fussy cut and layered up before adding lots of pearls and just a hint of...  you guessed it!
 Flocking Powder.


I've sprayed my topper (from the paper pad inner front cover) with a few coats of varnish and left it to dry before gluing it into place.
One Split Ring (from my own personal stash), some Twine and an Acorn Charm were all that was needed to finish...


*


Craft Consortium supplies used:

Winter Woodland

Always & Forever
Adhesive Pearls - 3mm

Decoupage Paper
This particular design is no longer in stock...  but they have plenty more to choose from!

*

Other supplies used:

Distress Ink
Peeled Paint
Broken China
Stormy Sky
Fired Brick
Festive Berries
Forest Moss
Twisted Citron
Ground Expresso
Frayed Burlap
Walnut Stain
Hickory Smoke

Distress Paint
Picket Fence

Frantage
Shaved Ice
Crystal

Stampin' Up
Chalk Marker

Ranger
Glossy Accents


*


So there you have it.

That's one more Decoupage paper project done and dusted...
but I have plans for more!


Stay warm...


Donna. x

Monday, 30 October 2017

Craft Consortium, Winter Woodland, Decoupage Luminarie

Hello!

I wanted to try my hand with something a bit different today - a decoupage Luminarie that has been decorated using toppers and papers that can all be bought from Craft Consortium...  

I've also used Flocking Powder and Pearl Glue to make the 'snow'...

 Not many of us think of using 'Flocking Powder', do we?

So I wanted to see if it could be done...  and more importantly - does it 'work'?

After all - you may already have some in your stash...

So what do you think?


I would say 'not my usual style', but as everything I make varies (due to me having perhaps way too much fun experimenting?) I've given up on that and hope you realise by now that once I have an idea in my head I just give it a shot!

After all, you never know if you don't try!


Here's a close up of the robin...


...  and a view from the top...


You did notice that musical note piece in the centre didn't you?
Not the centre of the top but of the inside?

What you won't know is that that part isn't like the rest of the luminarie...
It's covered acetate - not card.
Which means you can put a battery operated tea light 'round the back
(or a string of fairy lights perhaps?)
and have your display light up.

How do you cover acetate with decoupage paper?
Well, I'm sure there's more than one way...
But for this I simply used some permanent spray adhesive.

Easy peasy!


Here's a shopping list (with links) of supplies used...


*

Winter Wonderland
Metal Vintage Acorn Charms

Santoro - Kori Kumi
Raffia Cord Set
Flocking Powder Set

Decoupage Papers
Metallic Copper


*

I chose to spray this whole project with one quick coat of Clear Varnish as a final, finishing touch.

Why?

 Because as beautiful an effect as the Flocking Powder has, it does tend to shed a little.  One quick spray of varnish simply provides some extra adhesion - which can't be a bad thing now, can it?


I hope I've inspired you to have a playtime of your own!


More decoupage projects coming soon...


Donna... x

Thursday, 26 October 2017

Craft Consortium, Winter Woodland, Hedgehog Shaker Tag

I have a very quick Craft Consortium post to share with you all today...

a hedgehog shaker tag!


Aren't these little guys just the cutest?


I've included a photo breakdown of the steps used to make it...


*


Cut hedgehog patterned paper to size and mount on a piece of kraft card.
Next, add the stitched circle and glue it into place over the top of the image.  
Then cut out extra hedgehogs and glue into place to add dimension.


Next, cut another piece of Kraft card to size and add the aperture (stitched circle cut out).
Frame using single strands of twine.
(I used red liner tape to hold these in position).


Glue a thin silver glitter card frame into position that's an exact match in size to your base layer with the hedgehogs on.  Then secure these two layers together and leave to one side.
(This is your base layer).


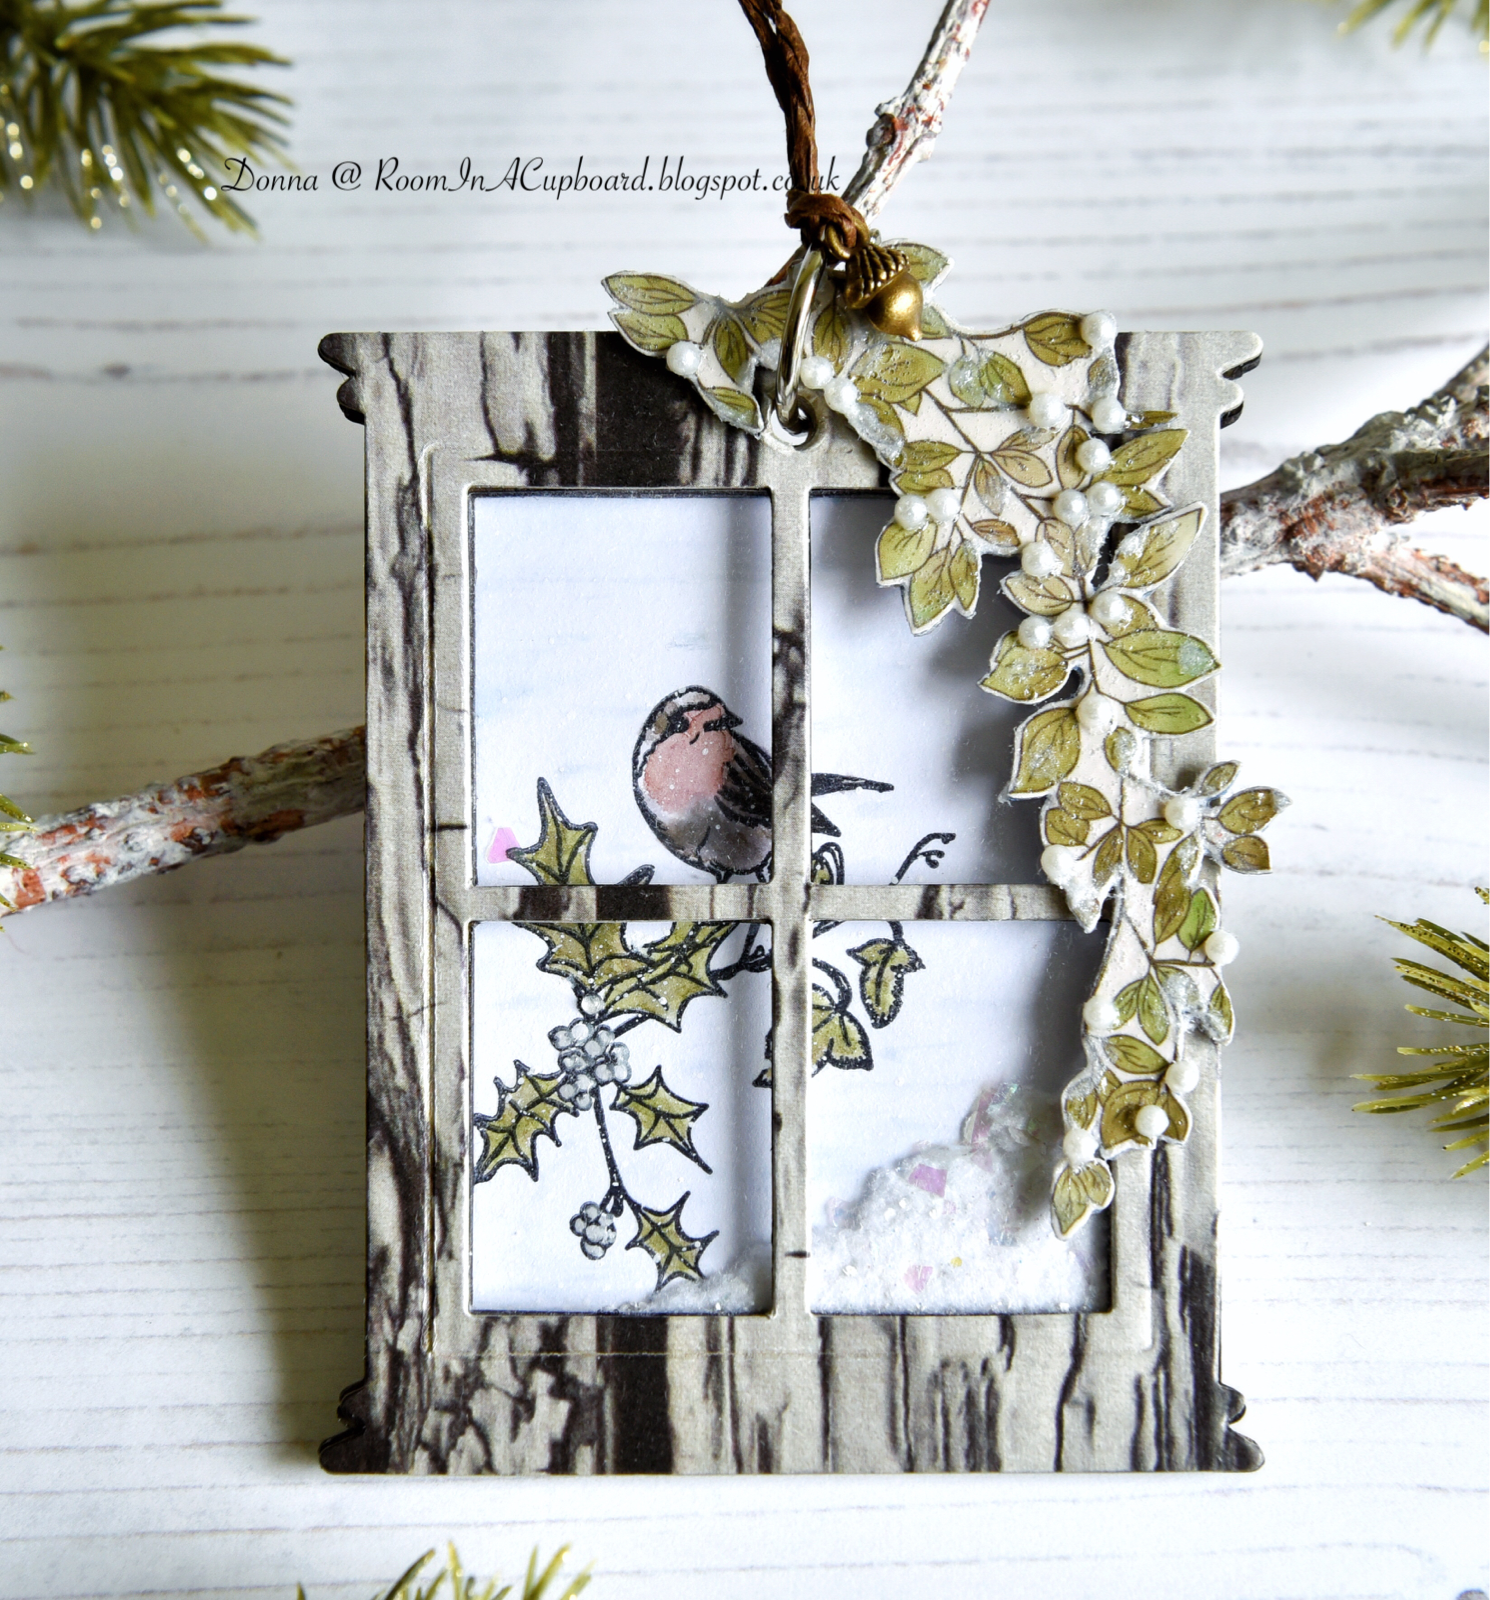
Make a frame that's very slightly smaller in size to your base layer.
Attach silver ribbon to the back of it (I cut my lengths of ribbon in half), then add a layer of acetate - also to the back.
Glue cut out flowers and leaves into position.
(These flowers have been treated to a layer of diluted White Pearl Glue prior to using.  It adds a lovely sheen to the paper).


Next, make two other frames that are exactly the same size as the one you just made above.

Add another layer of acetate to one of these frames - only this time add the acetate to the front, NOT the back.  (I used red liner tape for this part).
Using Silver Pearl Glue, add a thin layer all around the outside edge where the acetate meets the frame.  (Apply glue with your finger).
Leave to dry.

 Trim down the other frame from the outside edge and carefully apply Silver Pearl Glue to this one, too - only this time cover the inner as well as the outer edge.


Once dry, assemble these three layers together - thinest on top, followed by acetate covered in Pearl Glue, followed by acetate with flowers and leaves on.
But don't do that yet!
You need to remember to add your cut out 'shaker' leaves before you put these three layers together!

Once assembled, add more Silver Pearl Glue around the outside edges if you so wish.


Add a hanging loop into place...
and attach to the base section you made earlier.
(I used foam pads).


*


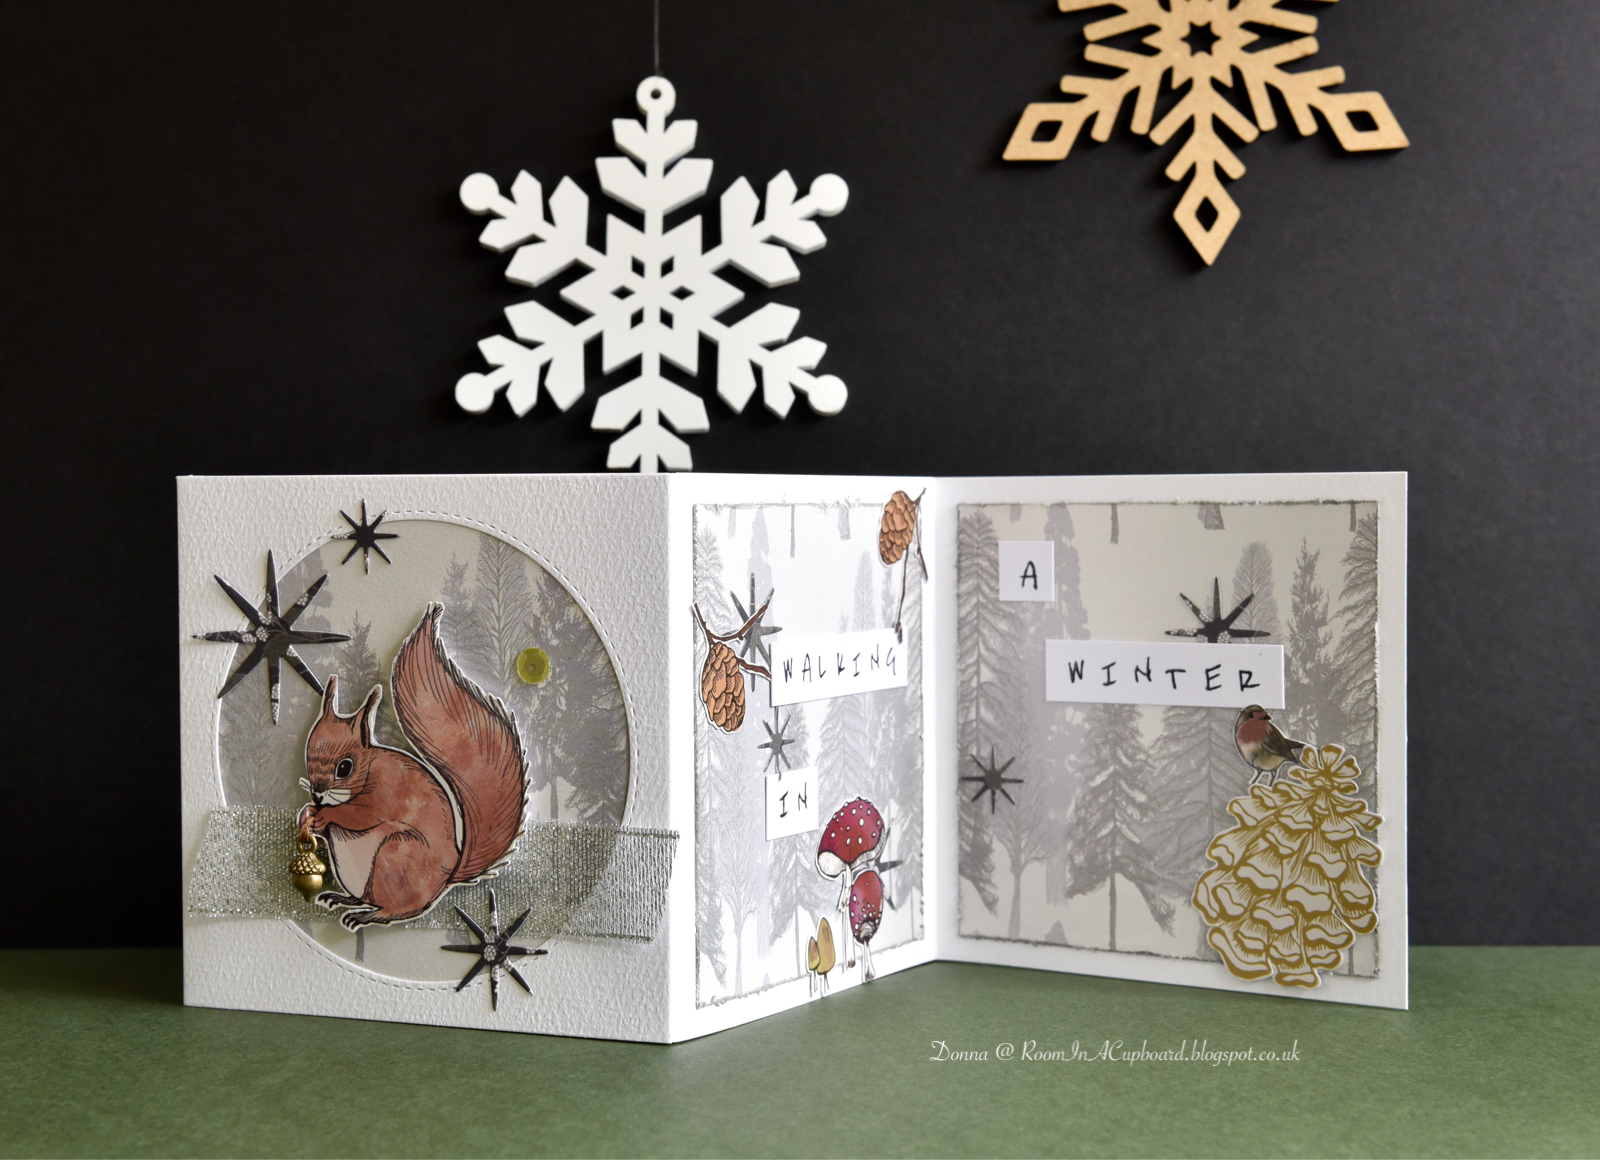
You will notice in that last picture that I've shown you what this looks like as just a plain shaker frame.
It would be equally perfect with a black and white photo in it - don't you think?


*

Craft Consortium supplies used:

Winter Woodland

*

Other supplies used:
Acetate
Stitched Circle die.
Red Liner Tape.

*


Enjoy your day...

Donna. x